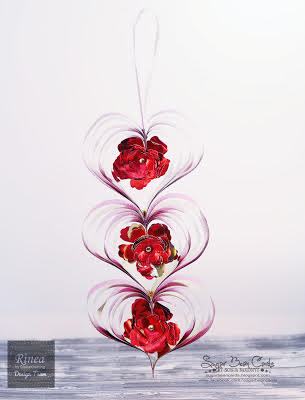
Foil Hearts and Flowers

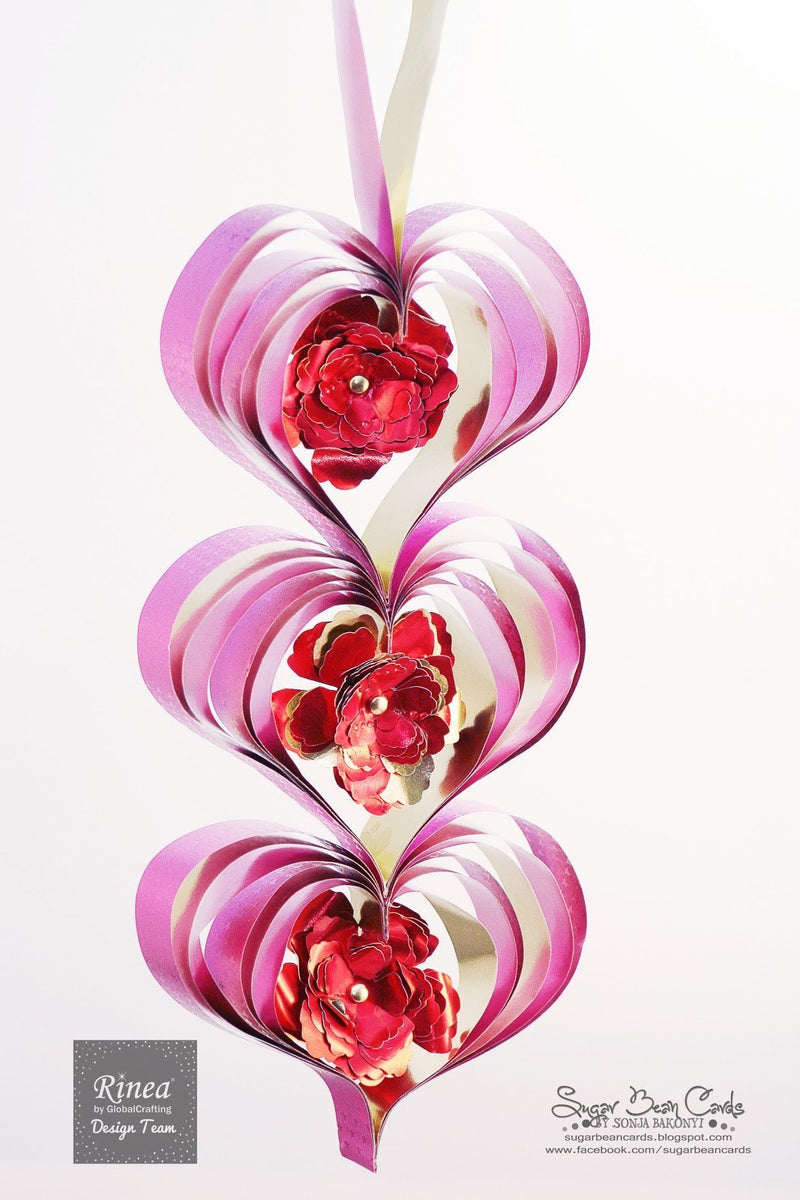
Hi all Sonja here. We made it through Thanksgiving, Christmas, New Years, and Valentine's! I am sure people are ready for a break from Holidays, however, I had to do this stack of hearts door hanger using Rinea Foil papers even if it is past the holiday hearts and flowers are fun year round!

Materials Needed:Rinea Foil: Gold, light pink, red, and dark pink
Scissors
Glue or adhesive tape
Paper Trimmer
Die cutter (Silhouette Cameo 3 and Sizzix Big Shot)
Embossing sleeve (optional)
Brads
Scissors
Glue or adhesive tape
Paper Trimmer
Die cutter (Silhouette Cameo 3 and Sizzix Big Shot)
Embossing sleeve (optional)
Brads

Step One: Strips of Foil
Start by cutting 6 strips of each color. I cut my strips at 0.75 in. wide by 13 in. tall.
Start by cutting 6 strips of each color. I cut my strips at 0.75 in. wide by 13 in. tall.

Step Two: Prep
To prep for the heart, I folded each strip in half.
Step Three: Lining of Heart
After folding each strip in half, I needed to trim the inside pieces. Leave the outer shell at 13 in. tall. The inside pieces need to be a little bit smaller then the next so that you end up with a stacked set of strips. Each piece doesn't have to be an exact measurement from the next piece, just has to be shorter!
NOTE: Each heart has two of the same strips in it. So two dark pink, two light pink, and two gold equaling 6 strips per heart. This is a designers choice you can go with more strips or less.
Step Four: Check Measurements
At this point, I checked to make sure that the strips would make the heart correctly and trimmed any strips that were too long. After checking to make sure all the pieces fit, set aside.
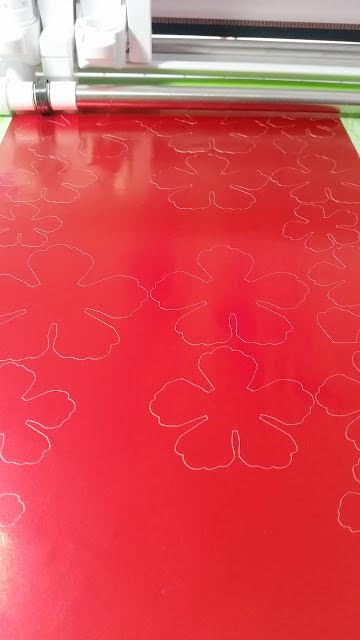
Step Five: Cut and form Flowers
I chose a rose file I had in my Silhouette library from the Silhouette store.
I cut three roses in the two sided gold/red foil. The settings for my Cameo 3 was on vinyl, blade 1, and pressure 1.
I chose a rose file I had in my Silhouette library from the Silhouette store.
I cut three roses in the two sided gold/red foil. The settings for my Cameo 3 was on vinyl, blade 1, and pressure 1.
Step 6: Optional embossing and assemble of flowers
Just to add some texture, I decided to emboss a few pedals. After the embossing, I poked a brad through the middle of each layer. Once the pedals are all secure, I took a tool and curled the ends. You can do this with anything that is small and round
Just to add some texture, I decided to emboss a few pedals. After the embossing, I poked a brad through the middle of each layer. Once the pedals are all secure, I took a tool and curled the ends. You can do this with anything that is small and round

|

|
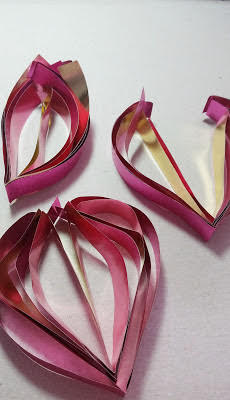
Step Seven: Assemble Heart
Add running tape to the end of each strip in the size order of longest to shortest. Line up the ends and secure together. Bend the strips into a heart shape and secure the ends together. Add glue at the bottom of the heart between each layer and secure until dry. At this point it looks funny, but just secure the bottom strips as instructed. Secure the bottom pieces brings the heart together.
Add running tape to the end of each strip in the size order of longest to shortest. Line up the ends and secure together. Bend the strips into a heart shape and secure the ends together. Add glue at the bottom of the heart between each layer and secure until dry. At this point it looks funny, but just secure the bottom strips as instructed. Secure the bottom pieces brings the heart together.

|

|

|
Step Eight: Decorate
I decided I wanted the flowers inside of the hearts. Another option would be to string them between each heart as well. But I wanted to glue my hearts stacked on each other.
I decided I wanted the flowers inside of the hearts. Another option would be to string them between each heart as well. But I wanted to glue my hearts stacked on each other.

Thank you,
Sonja Bakonyi
http://sugarbeancards.blogspot.com/
https://www.facebook.com/sugarbeancards/
https://www.pinterest.com/sonjabkn/sugar-bean-cards/
Sonja Bakonyi
http://sugarbeancards.blogspot.com/
https://www.facebook.com/sugarbeancards/
https://www.pinterest.com/sonjabkn/sugar-bean-cards/
Spark Your Creativity!