Wedding Favor/Gift Box Tutorial

Hello! It's Clair here, sharing my first Design Team tutorial for Rinea Inspires! As it's wedding season, I thought that I would show you how to make a lovely, little wedding favour (excuse my British spelling, I can't bring myself to drop the 'u') or, of course, you could make one as a gift!

I've made these little boxes before, with cardstock, but I found that I needed to add some adhesive or a sticker, at the final step, to help the box keep its shape. However, the unique 'Foil-Paper-Foil' of the Rinea Foiled Paper, holds its shape incredibly well without any additions! It's wonderful for structural shapes!
1. Trim a sheet of Silver/Gold Glossy Foiled Paper to 5 inches by 5 inches. Decide which side will be the 'outside' of the box. This side should face down at the start.

2. Carefully fold the sheet in half, then open the sheet out. Turn the sheet 90*, fold in half, then open the sheet out. This will create the two folds (as above.)

3. Now fold the sheet, corner to corner (as above) then open the sheet out. Turn the sheet 90*, repeat the corner to corner fold, then open the sheet out.

4. Take one of the corners, carefully, towards the center of the sheet (as above.) Repeat with all four corners, until left with a smaller square sheet (as below.)

5. Fold the bottom of the sheet, upwards, towards the center of the sheet. Then fold the top of the sheet, downwards, to meet it. You will be left with a small rectangle. Open the sheet back out to the smaller square, then turn 90* and repeat this last set of folds. Finally, open the sheet back out the smaller. square.

6. Your box is now ready to take shape. Open the left-hand and right-hand sides, to their fullest. Then lift the top and bottom, so that the 'sides' of the box start to form.

7. Push the sides of the box in carefully, using the score lines, to form another 'side' of the box.

8. Fold the rest of this side carefully over the folds, to form a stable side. The outer 'Point' will sit neatly in the center of the box. Repeat to complete the other side of the box. Run a bone folder across the outer rim of the box to firm the sides.
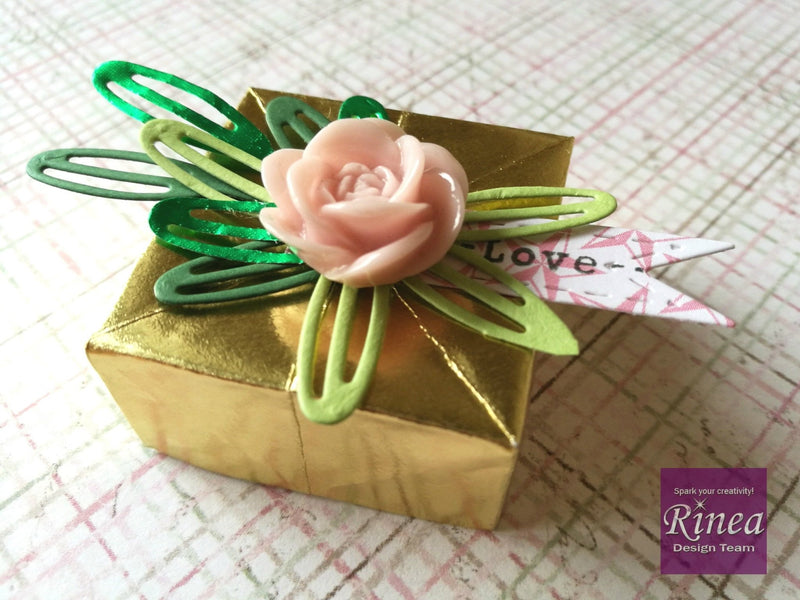
Use a 4 3/4 inches by 4 3/4 inches sheet to make another, smaller, box that will sit inside. Then decorate with some die-cuts leaves made with cardstock and, of course, a little bit of Emerald/Gold Glossy Foiled Paper.
I would be thrilled to see anything that you make using this tutorial. Please tag us with #rineainspires on Instagram, so that I can see!
Clair x
I would be thrilled to see anything that you make using this tutorial. Please tag us with #rineainspires on Instagram, so that I can see!
Clair x