Christmas/New Year Bells by Annie

Hello Crafty Friends - Annie here with some Christmas Bells!
Today's project is 2 beautiful bells for Christmas.
They would make fun decorations for a New Year's Eve party.
Each bell has a real jingle bell as a clapper - However, I didn't add any to my bells because I have cats and anything with jingle bells are stolen by them.
I found this tutorial on Pinterest by Susan Janes.

Materials Used:
Aleene's Tacky Glue
DMC Brand Metallic Thread: Red and Green
Poppy Stamps: Poinsettia Joy Set
Ms. Sparkle and Co. Brand: Snowflakes
EK Success Brand: Score Board
EK Success Brand: Scissors
Fiskars Brand: Stylus
Recollections Brand Cardstock: White
Let's get started!
It's much easier than it looks!
You can easily make these up in quantity as party favors or decorations.
Beautiful Bells Tutorial
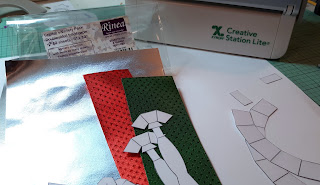
1. Prepping: Print and cut the bell pattern from white cardstock twice. Next, I ran the pieces through my Xyron Creative Station Lite and then place then onto the Rinea Foil Paper. The bell bodies and handles are in Rinea Glossy Silver/Gold Foil Paper and the decorative bands - I did one in Rinea Starstruck Ruby/Ruby Foil Paper and Rinea Starstruck Emerald/Emerald Foil Paper


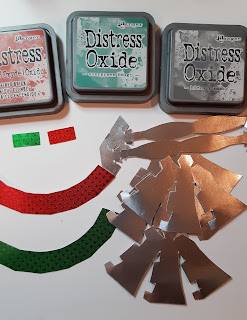
I then trimmed the pieces from the Foil paper and inked the edges. Since we have the white cardstock underneath I didn't want it to show. You should have 2 decorative bands, 2 decorative tabs, 2 handles and 4 bell pieces.
Next, I scored on all the lines on the back of the pieces. You can use a scoreboard like I did here or you can use a ruler, stylus, and mat or your trimmer.

2. Assembling the bell halves: Now, put some adhesive on all the tabs and press then underneath the panel next to it. Hold in place until the glue sets. Do this to both pieces.


3. Assemble two half-bells. Simply adhere together the adjacent tabs. You notice the 2 little hexagon tabs on the top are still not adhered.


4. Next, glue one top hexagon on top of the other, sealing the bell top. **If you are going to add a jingle bell this is when you do so. Pierce a hole through the little hexagon tabs. Using some thread pass the thread loop through the top loop of the jingle bell. Make a half-hitch knot and tighten it. Then, thread tails through a needle. Pass the needle through the hole in the top of the bell. The jingle bell cord should extend to the bottom of the bell. Knot the craft thread at the top. Trim it off close to the knot.

5. Join the decorative band into a ring. Apply glue onto the tab only. Meet the two ends together to form a ring. Next, add a bit of adhesive to the bell center as shown below. Slide the ring onto the bell and press in place.


6. Time to make the handle. Bend the handle into a loop - I used the handle of stylus tool so not to make a crease in the loop. glue the
straight section near the base together.


Next, The decorative band is wrapped around the straight section. Glue the band in place. Wrap it around the bell handle, creasing the folds.


7. Time to attach the bell handle to the bell body.
Open out the bell handle - spread its "wings".


Apply adhesive to a center section. Place the handle on top of the bell. Take your time and align the hexagons.

Then, fold the "wings" downwards and glue them onto the top section of the bell. The sections will align perfectly.
Repeat the above steps for the other bell.


8. More Decorations: Next, I decorated the bells with some stamped little tags. I die cut 2 labels from Rinea Glossy Gold/Gold Foil Paper and white cardstock for extra stiffness. I used the Stazon Pigment Ink in Piano Black and a Sentiment stamp that says JOY and another stamp that has little snowflakes. I punched a small hole on the top of the labels to make them into little tags. I then used some Metallic thread to tie them onto the bells.


Now, your bells are complete!

This is the Pattern Susan Janes Provided and I used.

Thank you for stopping by the blog today. I hope you found some inspiration!
Please stop by the Rinea Shop to purchase the beautiful Foil Paper.
If you create projects using our Wonderful Foil Paper be sure to tag us on Social Media.


