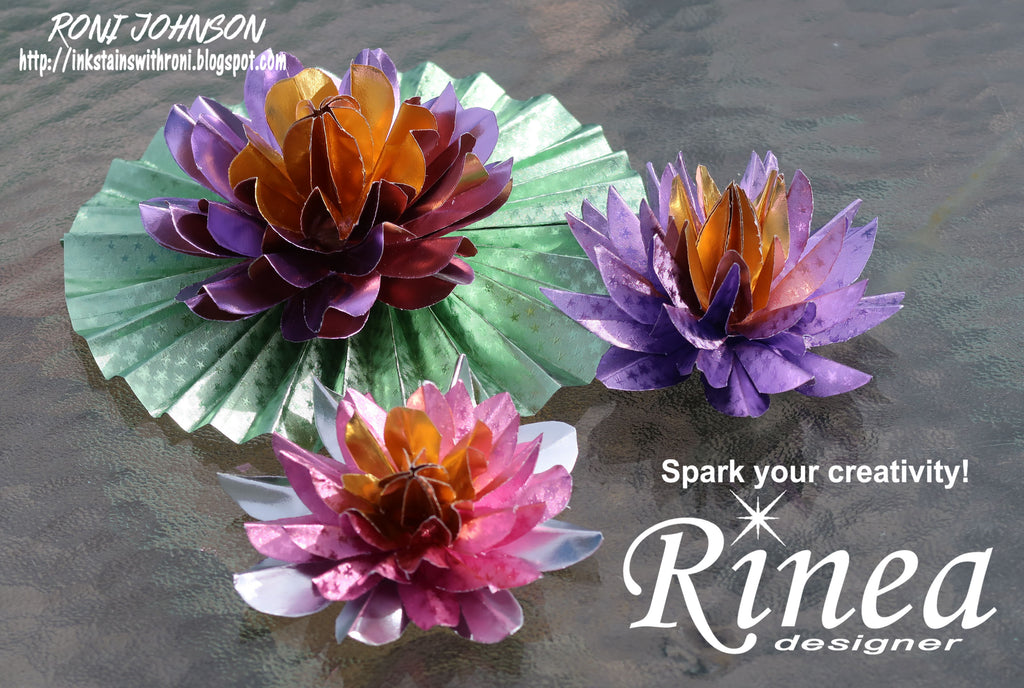
Create Lovely Water Lilies with Roni

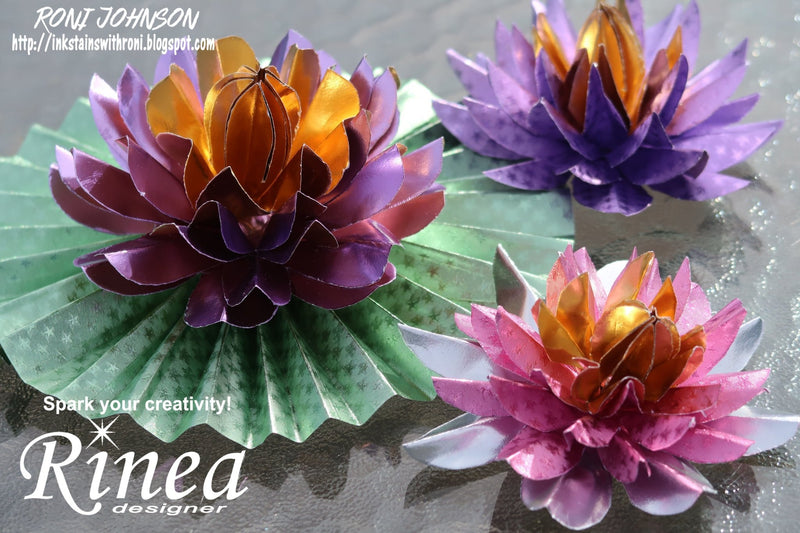
Summer is almost upon us and I don't know about you but it's about time! It felt like this past winter went on for years instead of months. Now that the weather is warming it's time to head to the beach and here in Indiana, that means a trip to the lake. One of my favorite aspects of visiting lakes is the lovely vegetation...water lilies in particular. They are just so pretty floating on the water like magic.
I know these look difficult and have several steps but they are really easy steps and once you fold one or two you'll be able to whip through them in a matter of minutes. The hardest part is deciding what colors you want to make them.
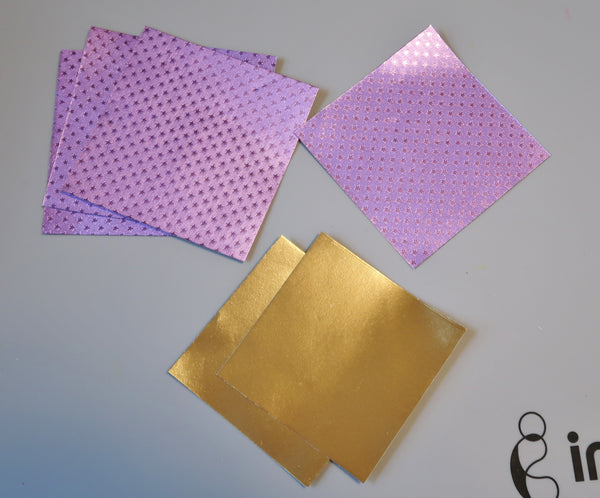
Step 1 - Cut (3) pieces of Lavender Starstruck Foiled Paper 4" square; cut (1) 3 3/4" square; cut (2) pieces of Gold/Gold Glossy Foiled Paper 3 1/2" square.
NOTE: You can make these flowers any size you like - just decrease the sizing down by 1/4" each time. For example (3) 3"; (1) 2.75"; (2) 2.5". For larger flowers, you might start out at 6" (or more) and decrease by 1/2" each time.
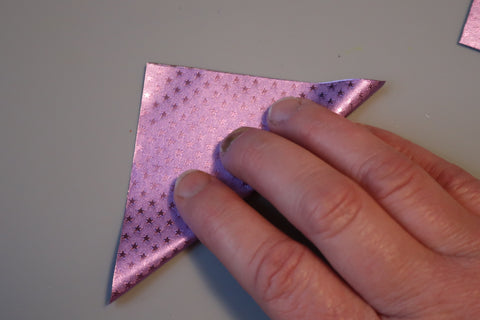
Step 2 - Fold one corner over to make a triangle.
Step 3 - Fold a corner over and make a smaller triangle.
Step 4 - Fold over a corner to make the smallest triangle.
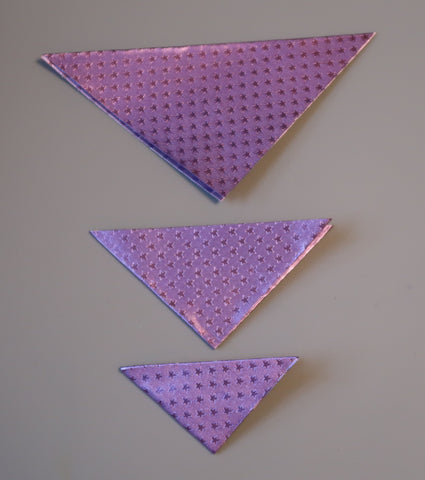
At this point, you have folded the paper three times creating a smaller triangle each time.
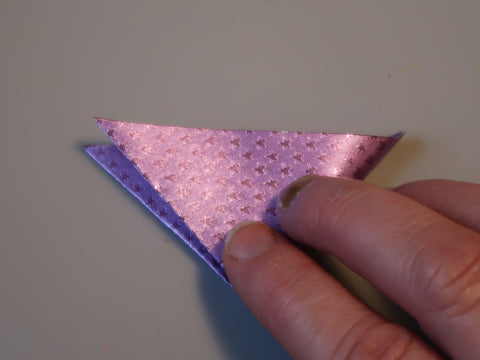
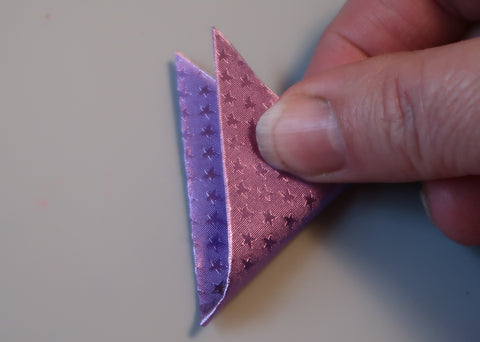
Step 5 - You now have a triangle that has 1 long side and 2 short sides. One short side has the fold and the other short side has multiple edges.
Take the short side with the folded edge and bring it towards the long side and crease as shown.
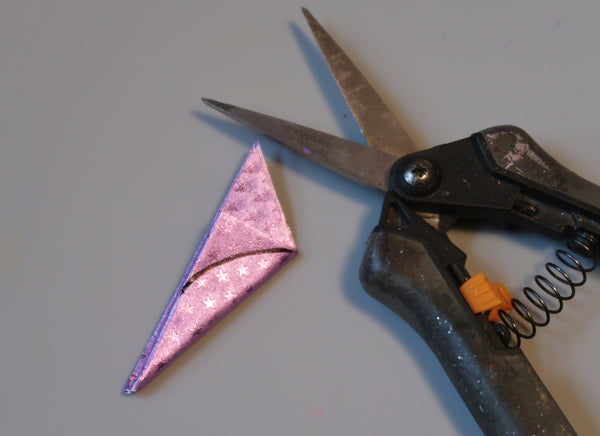
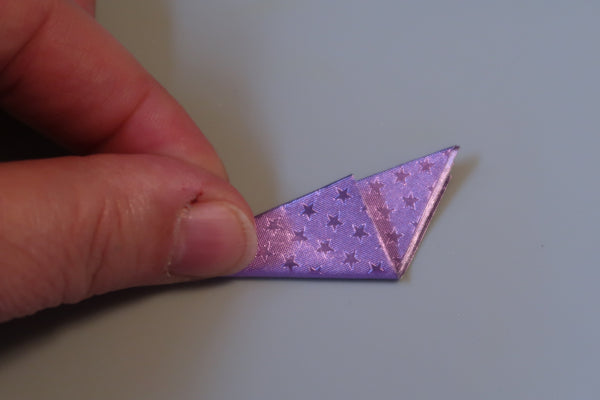
Step 6 - (optional) Draw a line from the corner to the center of the folded piece as shown. Once you get the feel for it you can skip this step.
Step 7 - Cut along the line, it will now look like a half of a petal. Snip the very tip off as well.

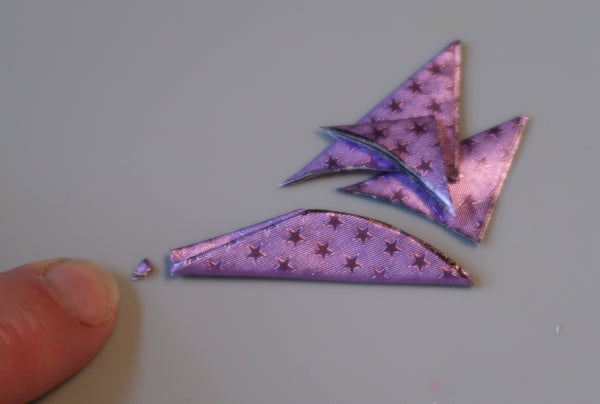
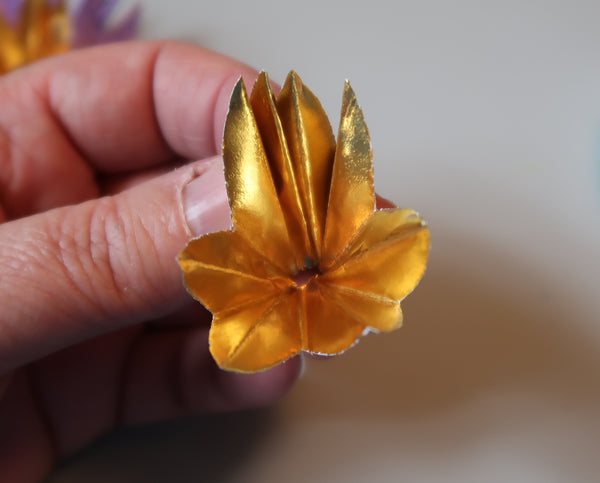
Step 8 - Gently unfold to reveal the flower.

Step 9 - Make small relief cuts between each petal about halfway to the center hole.
Step 10 - Crease a mountain fold in the center of each petal as shown.
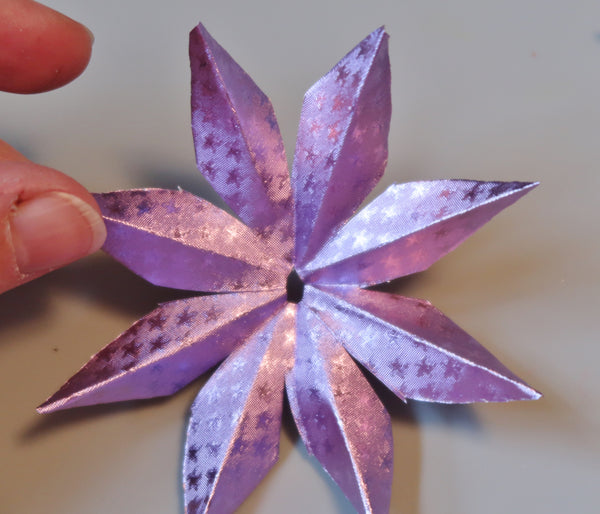
Step 11 - Repeat steps 2 - 10 for each of the remaining pieces of foiled paper.
Step 12 - Adhere to each layer of the flower using your favorite adhesive, I used glue dots but you could use liquid adhesive or a glue gun as well. From the bottom working up 3 large petals, the middle size petal and one of the gold petals.
Step 13 - Take the last gold set of petals; gather all of the individual petals into the center so all of the points meet and add glue.
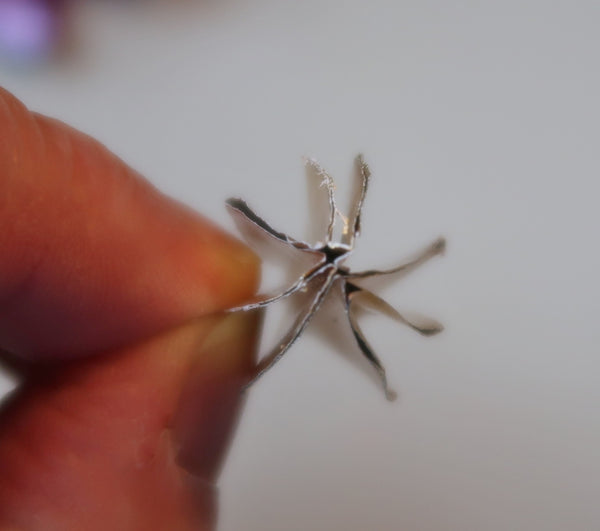
It will look like this when you look at either end - I know the points don't meet perfectly but nature isn't perfect either.
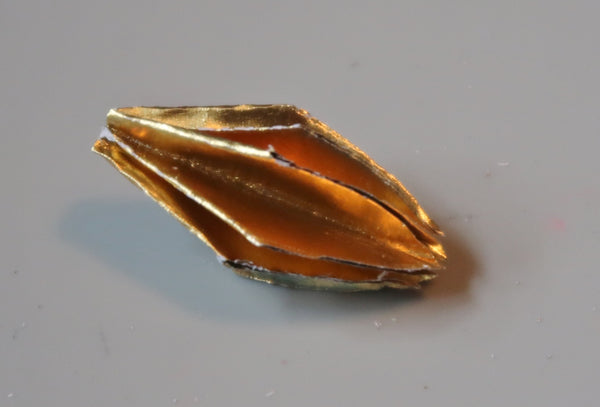
And it will look like this from the side.
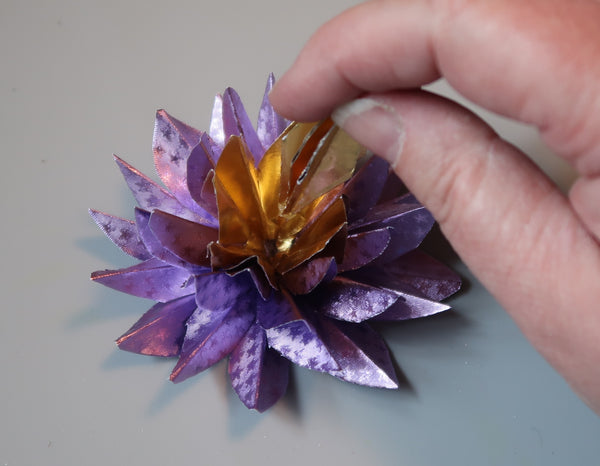
Step 14 - Adhere to this little golden football to the center of the flower.
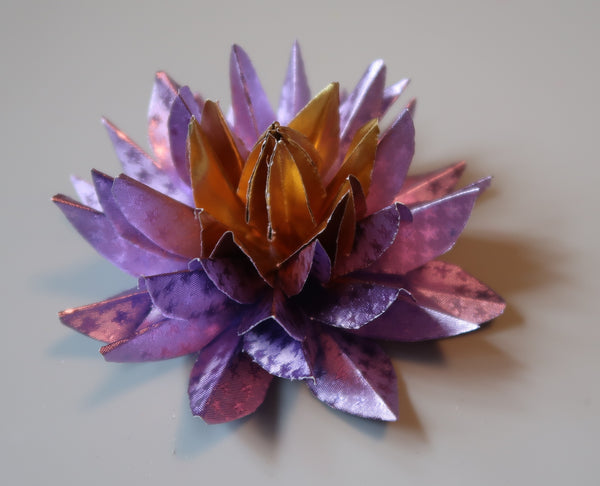
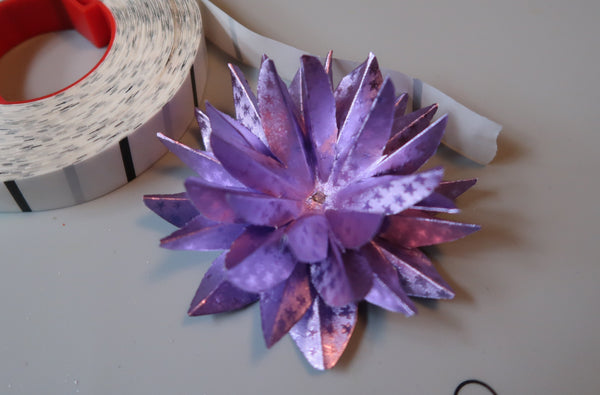
And you're done!
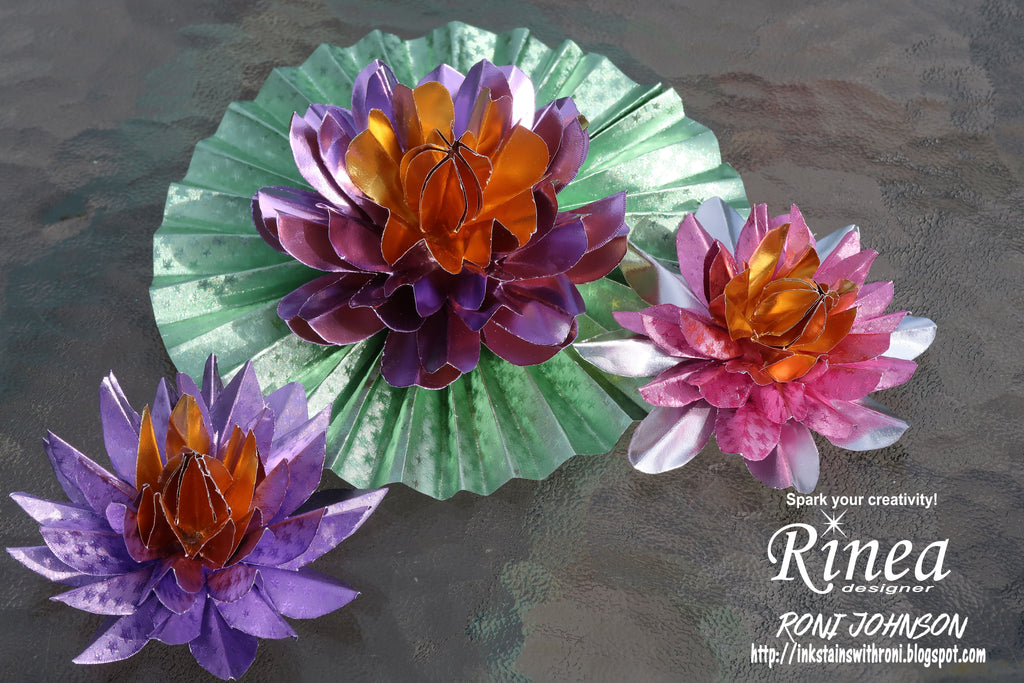
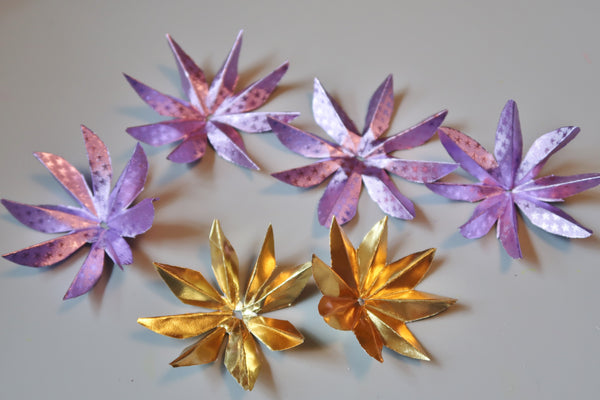
And here are a variety of sizes paired with a simple rosette "lily pad" that I made using Jade/Jade Starstruck Foiled Paper. These little gems would be perfect decor all summer long.
Supplies:
Rinea: Lavender/Lavender Starstruck; Lavender/Gold Glossy; Gold/Gold Glossy; Blush/Blush Starstruck; Silver/Gold Glossy, Jade/Jade Starstruck
Scissors
Adhesive