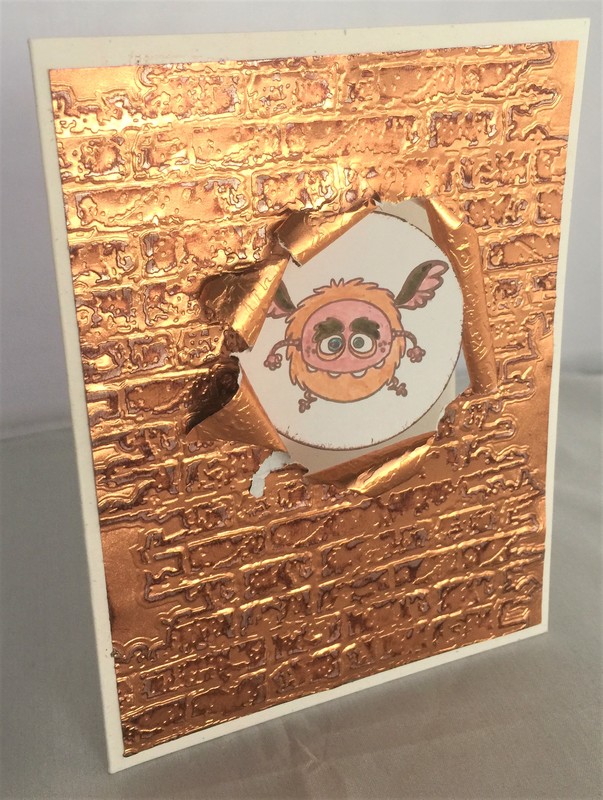
Cute Monster Card

Betz Golden has joined our design team and here is her first project as a designer with our team!! She made this cute card with a pop out and the Rinea foil in Copper. Check it out!
There are so many fun and creative ways to make a card. This is a great technique to use on cards to make them extra special – pop outs!
There are so many fun and creative ways to make a card. This is a great technique to use on cards to make them extra special – pop outs!
The materials needed to make this card include:
Copper Rinea Foil Glossy Paper
Markers
Monster Stamp
Ink
Stamping Paper
Shaker Card
Embossing Folder
Copper Rinea Foil Glossy Paper
Markers
Monster Stamp
Ink
Stamping Paper
Shaker Card
Embossing Folder
Here is a step by step tutorial on how to make the card.
1) Trim the Rinea foil paper to .25 inches less than card on both sides. For example, if your card measures 4 inches by 5.5 inches, you would trim it to 3.75 by 5.25 inches.
2) Emboss the Rinea foil paper
3) Using a fast drying ink lightly run ink pad over embossed Rinea. This will help the embossed pattern POP! Set aside to dry.
4) Stamp image and color.
5) Since this is a pop out card and the image is serving as the focal point for both the front and the inside of the card, it is important to decorate the inside too! Carefully fussy cut the stamped image or use a circle cutter making sure it is smaller than the circle it is popping through on card.
6) Cut a piece of scrap paper .25 inches wide by about 1.5 inches tall. Fold it up like you would to make a paper spring. Attach one end of paper spring to the image, and the other image to the inside of the card making sure image pops through card opening.
7) Adhere Rinea paper to card front.
8) Flip Card over and cut six slits (an X and + over the x)
9) Tear off a few of the pieces of Rinea foil paper and use a pencil to roll back the rest revealing the image. Make sure the image pops through the front of the card. Keep rolling back the Rinea and/or tear until the image pops through.
Your pop out card will fit in a regular sized envelope and is ready to be mailed! I hope you enjoyed this tutorial. Please share your pop out cards making sure you tag #Rineafoil and me (Scrappygal75 on Instagram). I would love to see what you create!
Until Next Time – Happy Crafting!
~Betz
~Betz
Spark Your Creativity!


