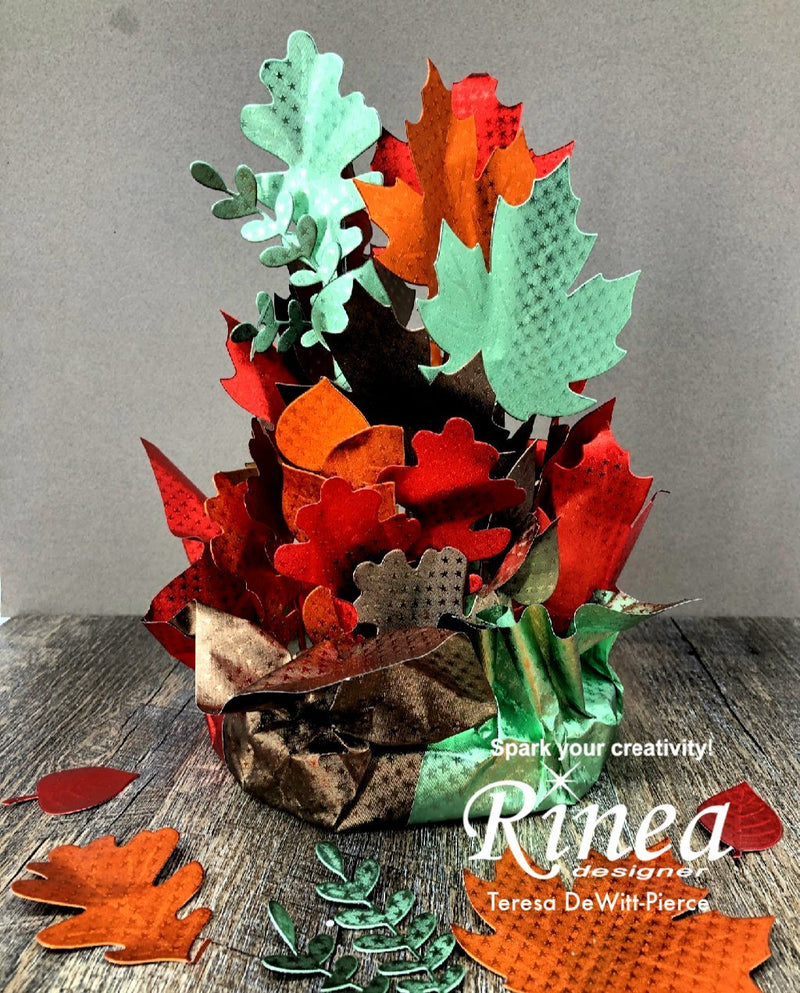
Fall Leaves Centerpiece by Teresa DeWitt-Pierce

Hi, Rinea fans,
It's Teresa from Whimsical Card Studio sharing a new project.
Are you loving the Fall season? One of my favorite parts is all the beautiful leaves and that was my inspiration for this project. I plan to make at least a couple more of these to put on my table at Thanksgiving this year.

Here are a couple of close-ups before I dive into the step by step directions


Step 1: Get a pack of Autumn Variety Pack Foiled Paper (Ruby/Mocha/Marigold) as well as a sheet of Jade Starstruck foiled paper.
Step 2: Die cut various sized leaves using dies (as I have used here) - my set is from Sizzix. It's best to have at least some leaves that are about 3" diameter to mix in with smaller sizes to create a pleasing arrangement. I cut about 8 leaves out of a 6" x 12" piece of foiled paper in all four colors.
Step 3: Use your fingers to shape the leaves so they are no longer flat.

Step 4: Prepare the sticks (I used thin Bamboo coffee stick stirrers - about 8") by wrapping them in the foil to match the leaves. Make sure to vary the sizes by placing the stick in the middle as shown or flush at the edge so you can get a variety of lengths

Step 5: add glue at the outer edge of the paper, place stick flush with the edge, fold stick in to wrap completely and cover the stick, gluing in place with double-sided tape. (I avoid wet glues because they take a long time to dry)

Step 6: Trim off the foiled paper from the wrapped stick using an Exacto knife or Penblade (as shown)

Step 7: Wrap several more sticks and cut to various lengths. I did this in a way to ensure there was some bare stick showing (which will be pushed into the base)
Step 8: Glue the leaves onto the sticks. (I used double-sided tape again)
Step 9: Repeat steps 2-8 for all the colors

Step 10: Prepare the base: cut four 6" x 6" sheets out of each color

Step 11: Glue the four pieces together to form a large square and place a foam circle in the middle (I used Desert Foam dry floral foam in .8" x 5.8") This is easier to poke things in compared to regular styrofoam.

Step 12: Arrange your "stems" in random spots, concentrating the taller ones in the middle and tapering out the sizes to the edge of the foam.
Step 13: Pull up the foiled paper around the foam base and shape it so it hugs the foam and shapes the excess in a way that looks pleasing to you.
That's all there is to it! I hope you enjoyed his tutorial and are inspired to make your own fall centerpiece. Rinea products are listed below so you can find what you need to put something similar together.
Until next time!
Teresa

