Foil Christmas Gift Box with a Surprise Inside


Hello all, Sonja here! Today I bring you a tutorial and an awesome little gift box using Rinea Foil. When I think Christmas, I think beautiful trees, lights, and gifts for others. I decided to combine that together with a little surprise inside of the gift box!

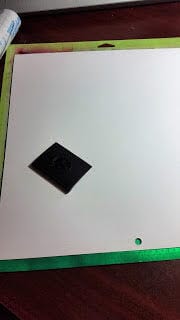
For this project, I used the copper, light green, dark green, and red out of the embossed assorted colors pack. To start with, use a very, very light tack mat. I put a piece of paper over the foil and smoothed it down onto the mat with my Silhouette scraper tool. I covered it with the sheet of paper just to not rip or scratch the foil. After it is smoothed down, you can see the wrinkles are out and this will help when cutting so that it doesn't hook on any previous indentations from your mat. After picking a design, I adjusted my cut settings and blade to copy paper and blade at 2. (Sugar tip: Each machine will differ pending the newness of your blade. I advise making a few test cuts!)

|
|

|

|
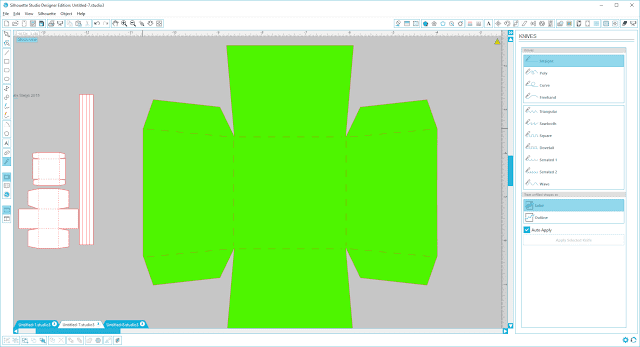
After choosing my files (Silhouette store), I decided that I wanted the box to be more of an explosion box so I needed to cut the sides off. To do this, use your knife tool on straight. I usually unclick auto apply so that I can line up all the lines exact and then slice them off.Once applied, I now have no arms to attach the box together which is what I wanted!


|

|
Next, I just cut out each piece. I find that with the foil, because it is a delicate material to work with, doubling up on the layers helps with stability. I also did this for the copper star on top of the tree.

|

|
For the tree, I adhered layers together for stability and the 3D effect. Arrange the layers together and glue the core together. I found that Aleene's tacky glue worked well with the foil, as well as ATG tape.

|

|

|

|
I didn't want to have an empty box. I needed a wow factor when it was opened. So I decided to go with a sleigh. In order to get the sleight to fit into the box, I had to scale it down, WAY down!

|

|

For the base of the box, I wanted the copper to line the inside of the box. I did not want it to be straight edged so I used the knife tool again to add a scalloped edge.

|

|

|
Then came the fun part, decorating! I happened to buy some fake snow-tex from Joann's for about $3 I believe. Just use a paint brush to dab where you want it to give your projects an extra added boost of life!


|

|
The sleigh is 3D with the same SC emblem on each side. The face snow just gives a little realness to what I imagine Santa's sleigh looks like at the end of his trip!


|

|
Materials Used:
Rinea Copper, Light Green, Dark Green, and Red foil
Silhouette Cameo (files from Silhouette store)
Aleene's Tacky Glue
Teresa Collins Mega Runner tape
Deco Art Glistening Snow-Tex glittering snow
Thank you,
Sonja Bakonyi
http://sugarbeancards.blogspot.com/
https://www.facebook.com/sugarbeancards/
https://www.pinterest.com/sonjabkn/sugar-bean-cards/
Spark Your Creativity!