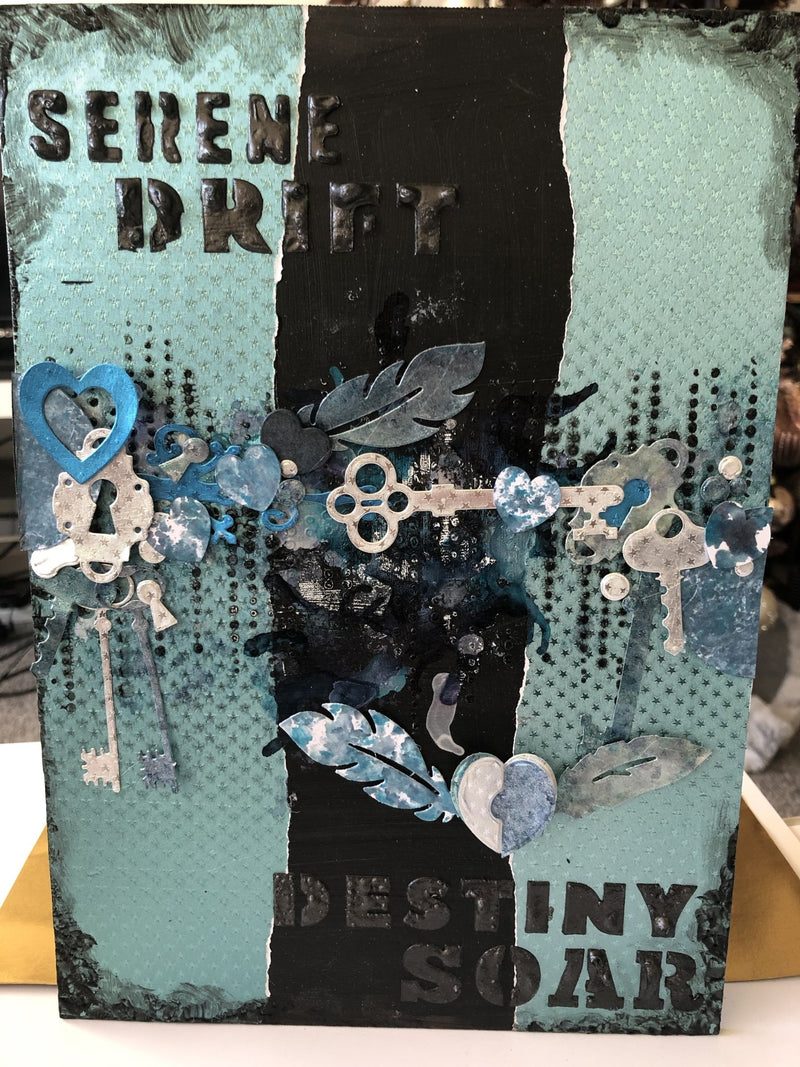
Beautiful Mixed Media Canvas by Natalie Ballard


You will need:
- MDF Plaque
- Frosted Rinea Collection Pack
- Black Gesso
- Black Crackle Paint (Artist uses Pretty Gets Gritty Get Cracked Gel in Oil)
- Graphite Texture Paste (Artist uses Pretty Gets Gritty Gritty Slate Paste
- Alcohol Inks and applicator
- Word and texture stencils (Artist uses Pretty Acoustic and Speciality Stencils by Pretty Gets Gritty)
- Key & Heart Dies (Artist uses Pretty Picasso Die Set by Pretty Gets Gritty)
- White Foil
- Gel Medium or PVA
- Hot Glue Gun
- Optional: Patina medium for adding contrast

Prepping your MDF Plaque
Start by applying black gesso to your MDF piece including the edges. Heat it gently with a heat gun to thoroughly dry before proceeding.

Building the Background
Use a 6x12" strip and tear lengthways in half, and apply to your MDF piece using gel medium or PVA. Again, you will want to heat this to make sure it sets, and you also want to wrap the paper slightly over the edge.

Applying Texture Paste
Using the graphite texture paste and a palette knife, apply the paste through a word stencil to create a sentiment or feeling of your choice. You can use masking tape to mask off words you don't wish to transfer. I added words to top left and bottom right corners for balance. You can use the heat gun on a low setting to set the top layer of the paste enough to continue.
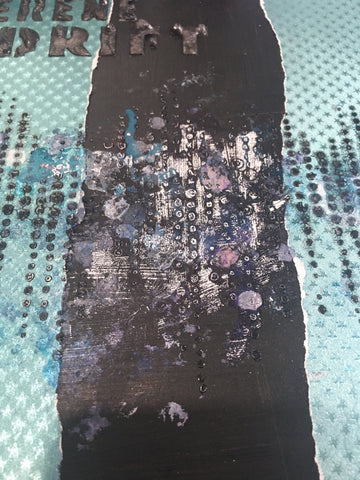
You can then apply the crackle paint to your texture stencil with a clean palette knife. Work across the centre of your MDF board.

Decorating Rinea Foiled Papers with Alcohol inks
So, I've gathered 5 shades of ink that complement the colours in the Frosted pack as well as rubbing alcohol (for cleaning and blending). You also need a felt alcohol blender. Work onto silver foiled paper for the best results, but you can use either starstruck or glossy.


Try to do a selection of different colour blends in patches so you get a good variety of shades in your finished piece.

Diecuts
You are going to cut your dies from your blended paper as well as the other shades in the pack. Fix with a little masking tape to prevent your dies slipping and damaging each other.

Adding more texture
Using the same alcohol inks and blender, add a little colour through the stencilled area. The pearl fixative will show over both the foiled paper and the gesso, while colours are better kept just to the foiled paper areas. Allow this to dry a little so it goes tacky, then apply white foil over the top.
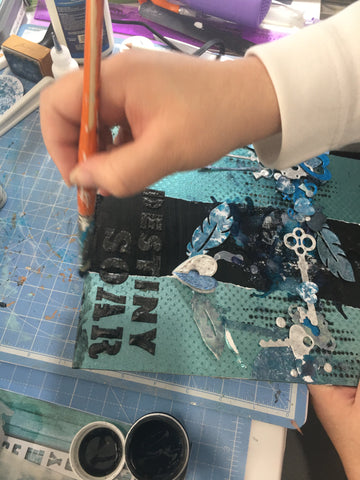
Applying the die-cuts and finishing the piece
Layout your pieces, you want to ensure that the colours are well mixed. I even used the waste elements to build up the layers. This includes mixing pieces of the heart jigsaw to create a 3D element. Adhere everything with a glue gun apart from the flattest pieces which you can use PVA for.
Texture the edges with more of the crackle paint applied with a brush to varying thicknesses. Thin layers will look "crazed" with a really fine crack where as thicker layers will crack with much more definition.
Finish with a piece of felt or adhesive velvet to the back and add a hook for easy hanging. You can also add patina to elements at this point if you wish.
