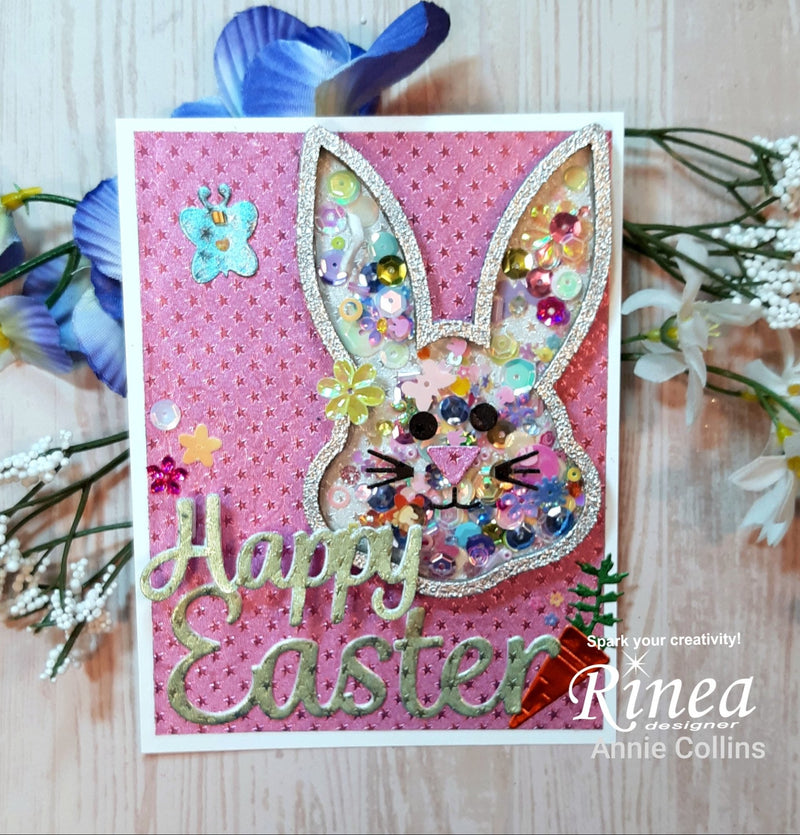
Happy Easter Shaker Card by Annie

Hello Crafty Friends - Annie here with a fun and easy Shamrock shaker card.
This month Rinea Design Team is collaborating with Creative Embellishments.
I know you will be inspired by all the wonderful projects the Design Team has created.
If you haven't heard of Creative Embellishments let me tell you a bit about them.
They create laser-cut Chipboard, Wood Veneer, and Stencils. They also have their own brand of Stamps and Flair.
This the card I created using the combined products.

Materials Used:
Evaney's Stamps and Dies: Happy Easter Bunny
Evaney's Stamps and Dies: Dig It
Nuvo Glitter Embossing Powder: Silver MoonLight
Recollections Brand 110lb Cardstock: White (card base)
Ms. Sparkle and Co. Ink: Silver Metallic
3M Tacky Glue
Let's Get Started!
I gathered all of my components. I gathered all the components to the card.
Along with my Xyron Creative Station Lite, Ms. Sparkle and Co. Silver ink,
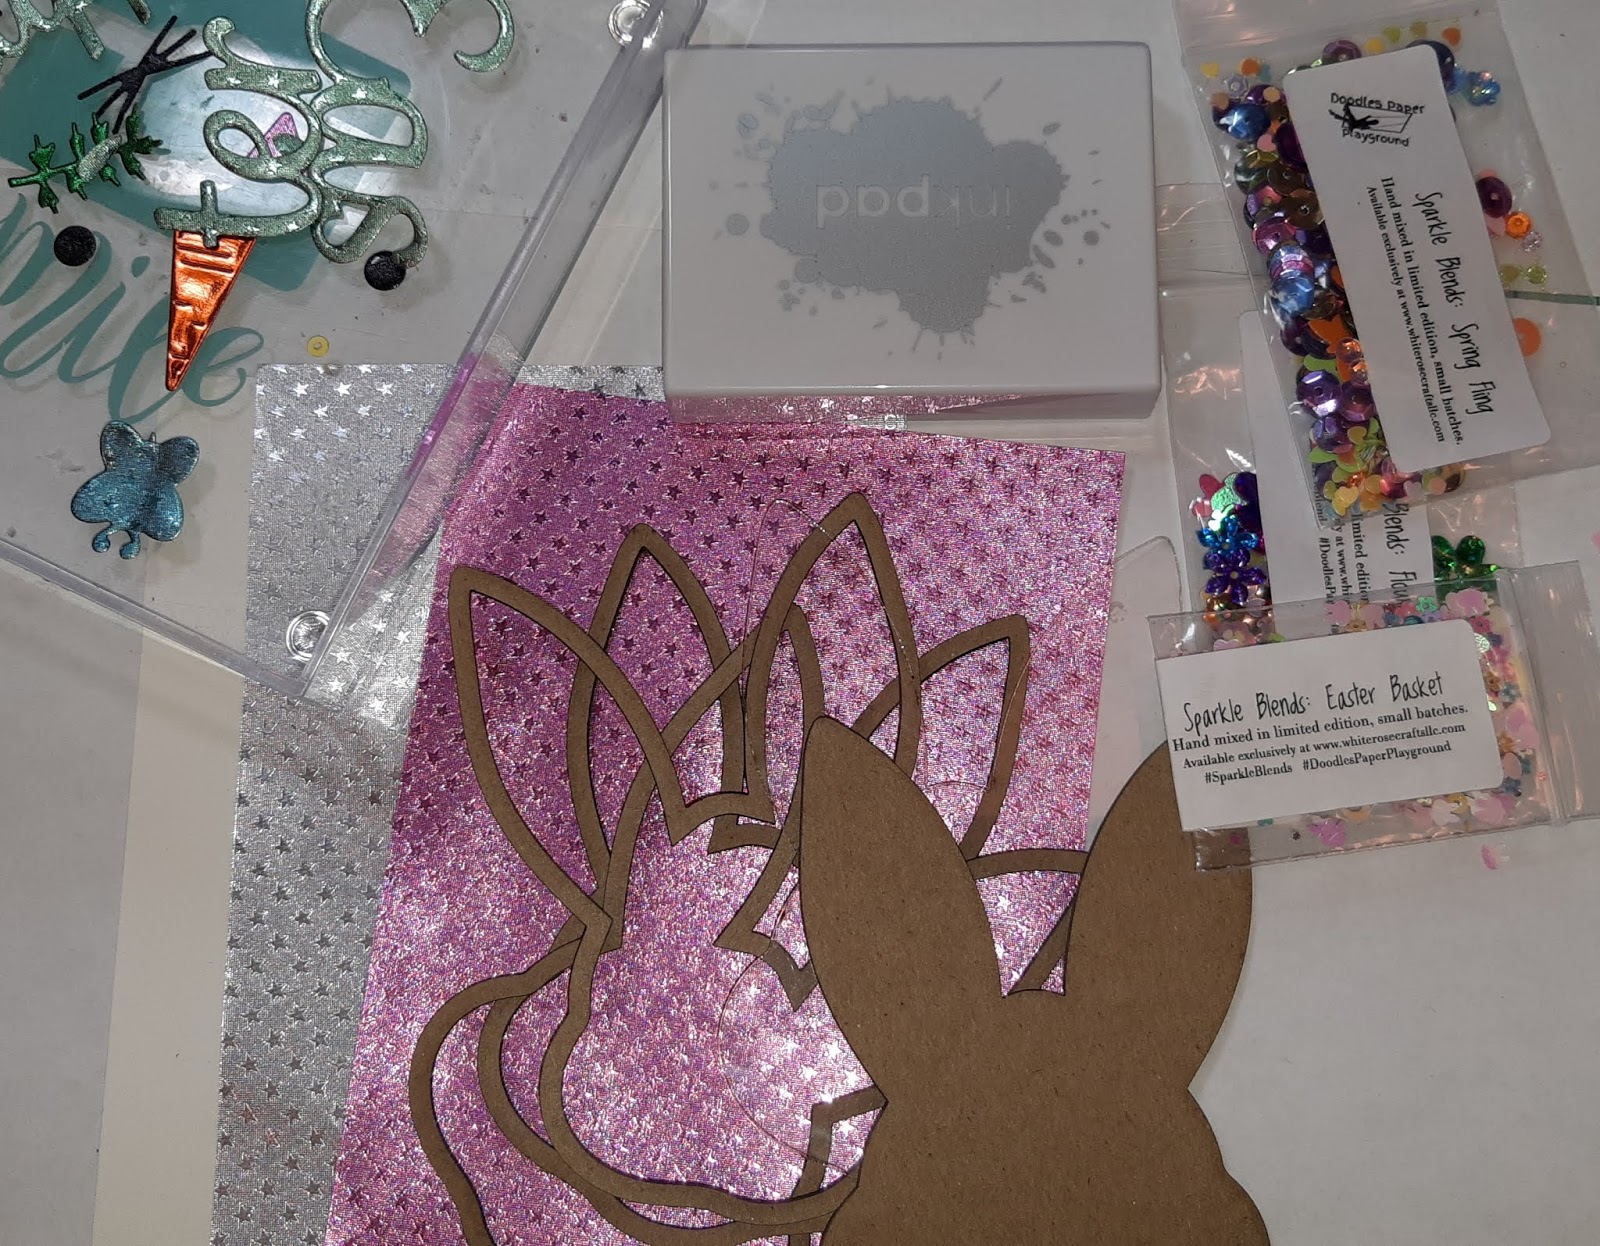
I then ran Rinea Silver/Silver Starstruck Foiled Paper,
Rinea Blush/Blush Starstruck Foiled Paper, my sentiment which is die-cut from Evaney's Stamps and Dies: Happy Easter Bunny
using Rinea Jade/Jade Starstruck Foiled Paper and white cardstock twice.

Then, I inked all the edges of the
Ms. Sparkle and Co. Ink: Silver Metallic - this is optional but I think it gives the bunny a finishing touch. Next, I inked one of the open pieces from
the Creative Embellishments: Bunny Shaker Set with the Ms. Sparkle and Co. Ink: Silver Metallic and then I put some
Nuvo Glitter Embossing Powder: Silver MoonLight and heat set it.


Next, I pressed the Rinea Silver/Silver Starstruck Foiled Paper onto the base of the
Creative Embellishments: Bunny Shaker Set and trimmed away the extra paper.


Then, I adhered the other open pieces to the base of the
and set aside to dry with a stamping block on top.

Next, I adhered to the Rinea Blush/Blush Starstruck Foiled Paper to the card base. Then, I adhered the sentiment word Easter to the bottom left corner and the Bunny base to the right top corner of the card.


Then, I filled the shaker with a mixer of Doodles Paper Playground Sparkle Blends. I then adhered the acetate to the base along with the embossing top.


Next, I adhered the little bunny face to the shaker. I die-cut them from
Evaney's Stamps and Dies: Happy Easter Bunny. I then die-cut a carrot and butterfly from the Evaney's Stamps and Dies: Dig It
I adhered the butterfly to the top left corner and the carrot by the Easter sentiment. I adhered the sentiment Happy just overlapping the bunny using a bit of foam adhesive.


For some finishing touches, I added a few Sparkle Blends
to the butterfly, to the bunny's ear and a few tiny ones by the sentiment.
Now the Happy Easter shaker card is complete!

Thank you for stopping by the blog today. I hope you found some inspiration!
Please tag us on social media if you create any project using any of our wonderful Foil Papers!
Don't forget to stop by the shop Rinea.com