How To Add Dimension and Shine To Mixed Media With Foiled Paper
by Jenn DuBell

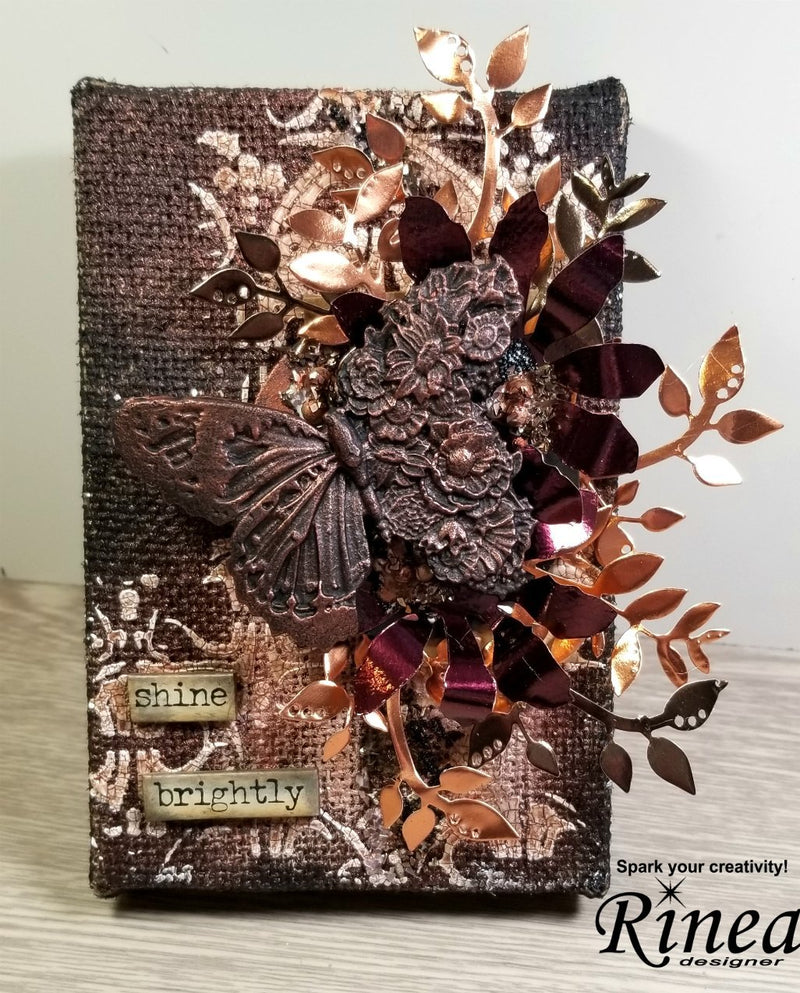
Hello everyone! Jenn here today sharing a little mixed media panel I created. In this post, I will show how I used die cuts with Rinea foiled papers to add shine and dimension to my panel.

Step 1 - Create a background on the panel. I have used a small burlap covered panel from my stash.
1. Coat lightly with heavy white gesso. be sure to leave some open space. Next brush on some black gesso making sure to leave some of the white as shown in photo 2 below.


2. Use a stencil and add some crackle paste in the area that will be under your main focal point. I have used a Finnabir background stencil with Tim Holtz Distress texture paste Crackle.


3. Once the crackle has dried completely add some color using sprays. I used Lindy's sprays in brown tones.

Step 2 - Set the panel aside to dry completely and die cut the foiled papers using dies of your choice. I have used some leaf and floral dies for mine.

Step 3 - Assemble!

Step 4 - Finish with a focal point object. Mine is a Zuri molded butterfly which I used Ranger Quick Cure Clay to mold. It was painted black and waxed using wax pastes in coordinating coppers.
Here is a closer look of the beautiful shine and dimension achieved using this technique.

Have an amazing crafty day!