How To Create A Dimensional Easel Card
by Jenn DuBell


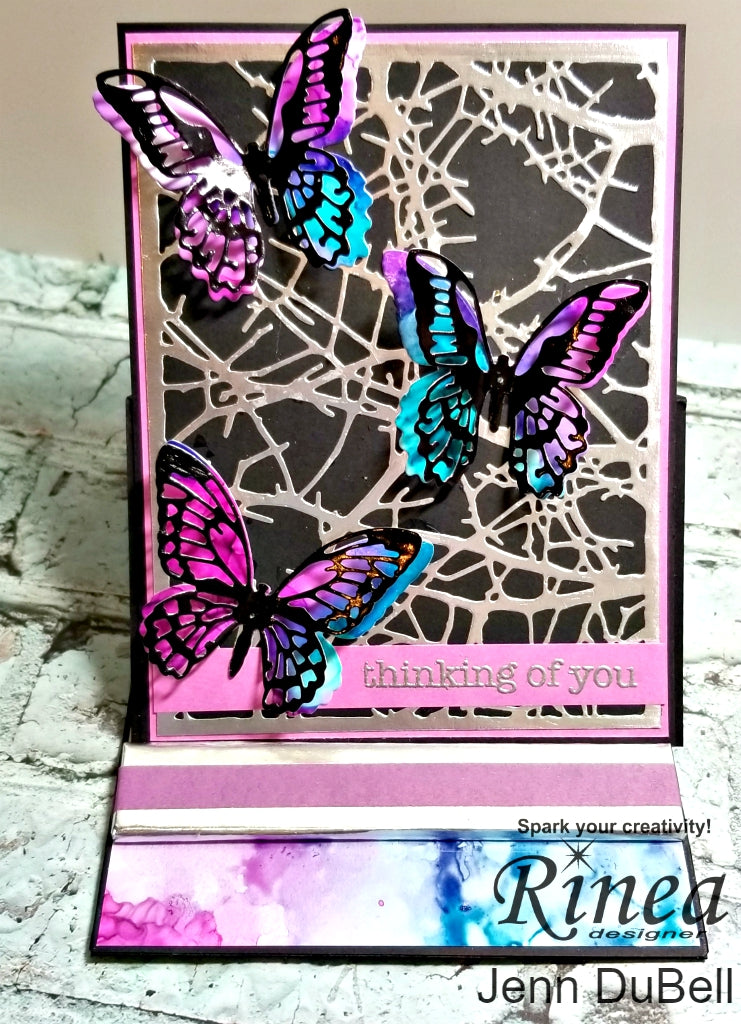
Hello! Jenn here today sharing how to create a dimensional easel card using Rinea Foiled Paper with die cutting.
Step 1 - Create the easel card base as follows:
Black cardstock cut to 4 3/8" X 11 3/4"
Score at 2 3/4, 5 1/2, 5 3/4, and 11 1/4 The last 1/2 inch fold is to adhere to the inside pocket.
** Note ** Measurements can be adjusted to suit the size of the background die being used. This was the best for my card.
Black cardstock cut to 4 3/8" X 11 3/4"
Score at 2 3/4, 5 1/2, 5 3/4, and 11 1/4 The last 1/2 inch fold is to adhere to the inside pocket.
** Note ** Measurements can be adjusted to suit the size of the background die being used. This was the best for my card.
Step 2 - Die cut butterflies using Tim Holtz Sizzix Thinlits or whatever dies you choose. These worked great because they have a solid and detailed die for each butterfly. I cut the detail using the ebony glossy foiled paper and the solid from an alcohol inked background. Cut 3. Use Silver Glossy Foiled Paper to cut background and adhere to black cardstock the same size. Add a coordinating matte. I used a fuschia cardstock and then adhered to the card cover. The card cover should be the same color as easel base (black here) and measure the same.

Step 3 - Use a strong adhesive on just the middles of the butterflies and adhere them together. Use a paper clip or similar to keep them together and allow them to dry.

Step 4 - Create a pocket by cutting a piece of cardstock (same color as the base) the same width as your card plus 1 inch to allow for 1/2" scoring on each side. The pocket can measure whatever height you choose, mine is 2 1/2" and I have cut a notch in the middle and covered with leftover alcohol inked background. Embellish inside of card with colored cardstock. Adhere to the bottom of the pocket to the tab at the end of base as shown below. Add glue to the scored 1/2" side tabs and fold up to create the pocket.


Step 5 - On to the cover....Add a stamped sentiment strip to the bottom and apply glue only to the scored 2 3/4" bottom flap of the base. Line up card front to the bottom and adhere. Use glossy foiled paper to cover a bar of chipboard and adhere to the pocket. This will act as the stand for the easel for display.


Step 6 - Finally, Fold flat and add those beautiful butterflies! Adhere the solid portion only to the card and let dry then shape and form the wings for dimension.


