How To Make A Pretty Tea Bag Dispenser
by Annie Collins

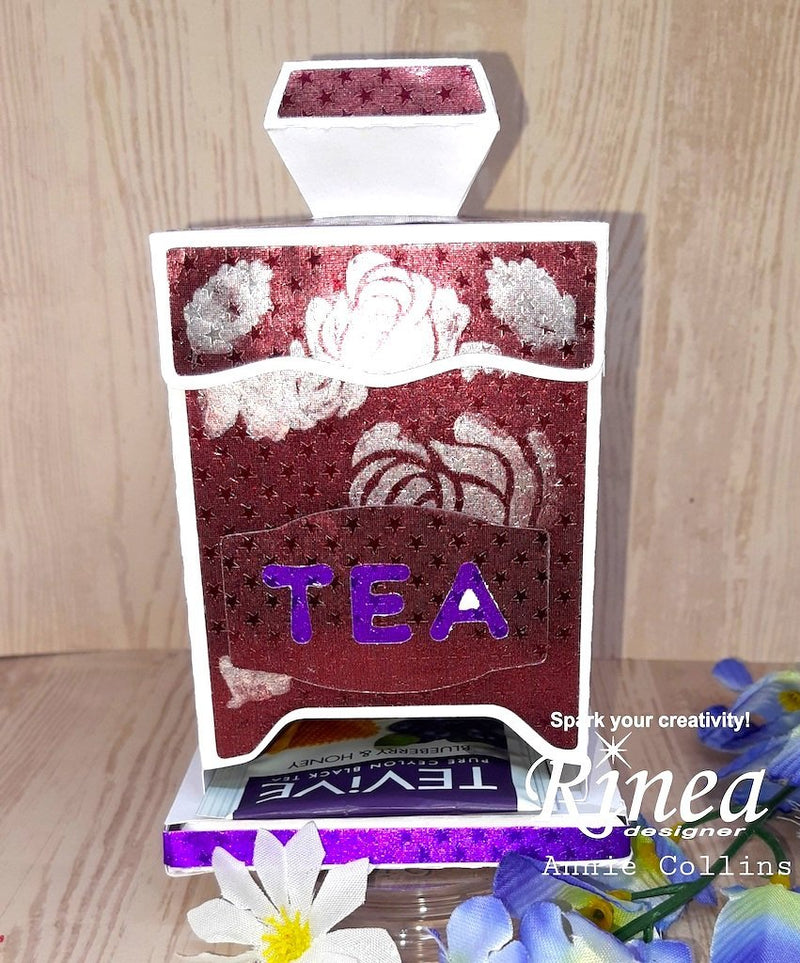
Hello Crafty Friends -Annie here with a cute Tea Bag dispenser perfect for that special some in your life that loves Tea. Perhaps it's you that loves tea.

Materials used:
SumMore Fun Stamp: Sundri's High Tea
Papertrey Ink Stamp: Rosies Posies
MFT Brand Die: Fishtale Sentiment
Copic Marker: E33 & R23
Tsukineko Memento Ink: Tuxedo black
Tsukineko Versafine Ink: Onyx Black
Imagine Crafts: Tear it Tape
Art Glitter Glue
Crafter's: Foam Adhesive
Recollections Brand 65lb cardstock: White
Brother:Scan N Cut Electric Machine
Lets get started!
I gathered the supplies and cut all the pieces with my Brother:Scan N Cut Electric Machine.
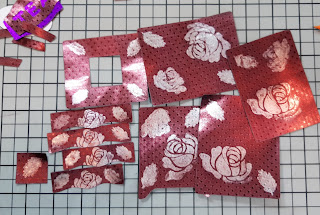
I cut the base of the Tea Dispenser from white cardstock. I cut the panels for the Dispenser from Rinea Foiled Paper: Merlot/Merlot Starstruck.
Next, I stamped the roses and leaves onto
the Rinea Foiled Paper: Merlot/Merlot Starstruck panels for the dispenser
with Rinea Ghost Ink 2.0. Allowed the ink to sit for about a minute and then rub it off to reveal the beautiful silver layer. I set them aside while I create the bottom of the dispenser.

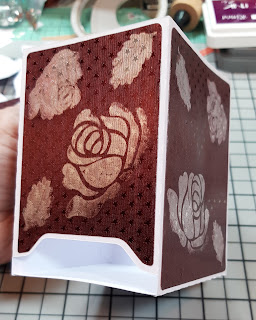
I adhere the tab of the bottom piece to the other; creating a long base piece. (if you have ever made a pop-up box card it's the same concept). While the bottom is flat, I adhered the Rinea Foiled Paper: Merlot/Merlot Starstruck panels onto the bottom. Making sure to center the panels so that I had a bit of the white cardstock showing.


Next, I adhere the other tab of the bottom portion of the dispenser to create the box shape.


Then, I flip the box upside down and put some glue onto the tabs. I then bring the flap down and press the tabs into place. The, flip the box right side up and apply some pressure inside the box to make sure the tabs are secure. You can leave the bottom of the dispenser here and just place a square piece of cardstock to cover the tabs. However, the SVG file comes with a little base that give it a cute finished look.


For the *base for the dispenser (has 3 squares and 2 strips with the multi-tabs)
I adhered the 2 strips with the multi-tabs together. By applying a bit of glue to the small tabs on the end of the strips. This will create a square frame. Place the larger tabs towards the bottom and put some glue on the inside of the frame on the tabs. Then, insert one of squares into the frame. Press in place with your fingers. Next, apply some glue onto the smaller tabs and adhere one of the squares to the frame. Flip over the frame aka flat box and adhere the last square to give the base a clean finish.


Then, I adhered strips of Rinea Foiled Paper: Violet/Violet Starstruck to the base. I then adhered the base onto the bottom of the dispenser. Making sure to center it. The bottom of the dispenser if done. I set it aside to create the lid.


Next, I gather the lid pieces ( 1 white cardstock lid, 1 white cardstock knob, 1 white cardstock inner panel, 1Rinea Foiled Paper: Merlot/Merlot Starstruck lid top panel,
4 Rinea Foiled Paper: Merlot/Merlot Starstruck lid side panels,
1 Rinea Foiled Paper: Merlot/Merlot Starstruck knob topper and
4 Rinea Foiled Paper: Merlot/Merlot Starstruck knob side panels.) I adhere the
Rinea Foiled Paper: Merlot/Merlot Starstruck panels onto the white cardstock pieces.


Then, put a bit of glue onto the small tab and press it into place. repeat this on all the tabs. Then, put a bit of glue onto the bigger tab and press it into place. repeat this on all the tabs. This will create the knob for the lid.


Next, insert the tabs of the knob into the center opening of the lid panel. Then, put a bit of glue on the tab and press in place. The knob is now attached to lid. Next, put some glue on the tabs of the lid and press in place. Once the lid is formed. Adhere the inner panel to the inside of the lid. The lid is now finished. Place it onto the bottom of the dispenser.


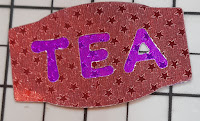
Next, I adhered the tea label together. I adhered the Rinea Foiled Paper: Merlot/Merlot Starstruck label onto the Rinea Foiled Paper: Violet/Violet Starstruck label. Then I adhered the labels onto the white cardstock label base. I put some foam adhesive onto the label and press it onto the Tea Dispenser


Now the Tea Bag Dispenser is complete!
Fill it with your favorite tea. If planning on gift giving the dispenser then fill it with their favorite or a gift card to their favorite tea shop.
Thank you for stopping by the blog today. I hope you found some inspiration!
Don't forget to stop by the Rinea Shop to pick up some of our wonderful Foiled Paper.