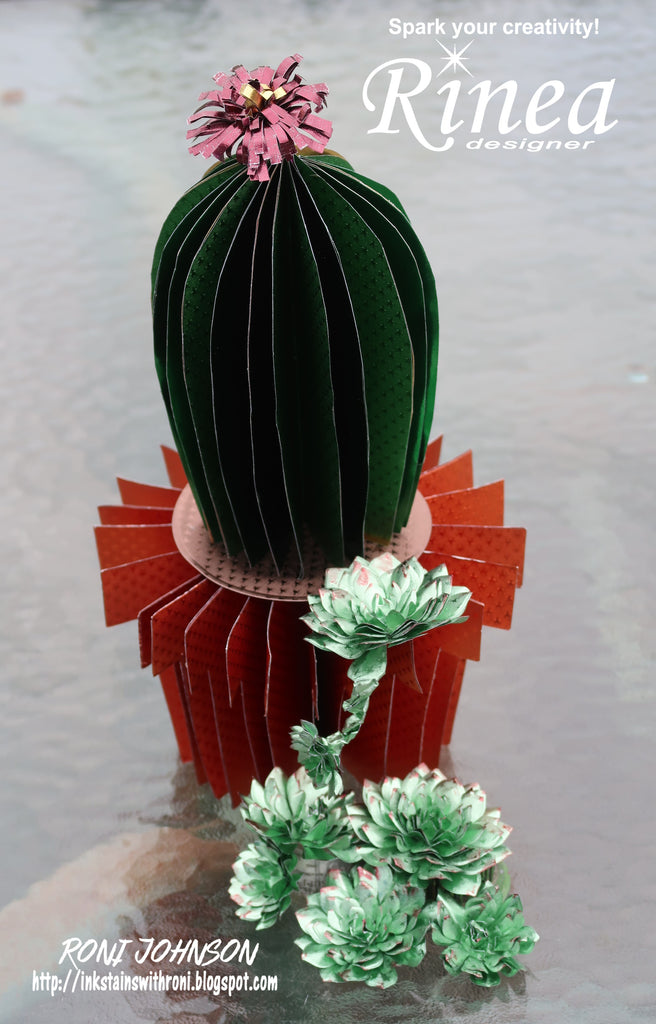
Learn How To Make a 3D Cactus Display
by Roni Johnson

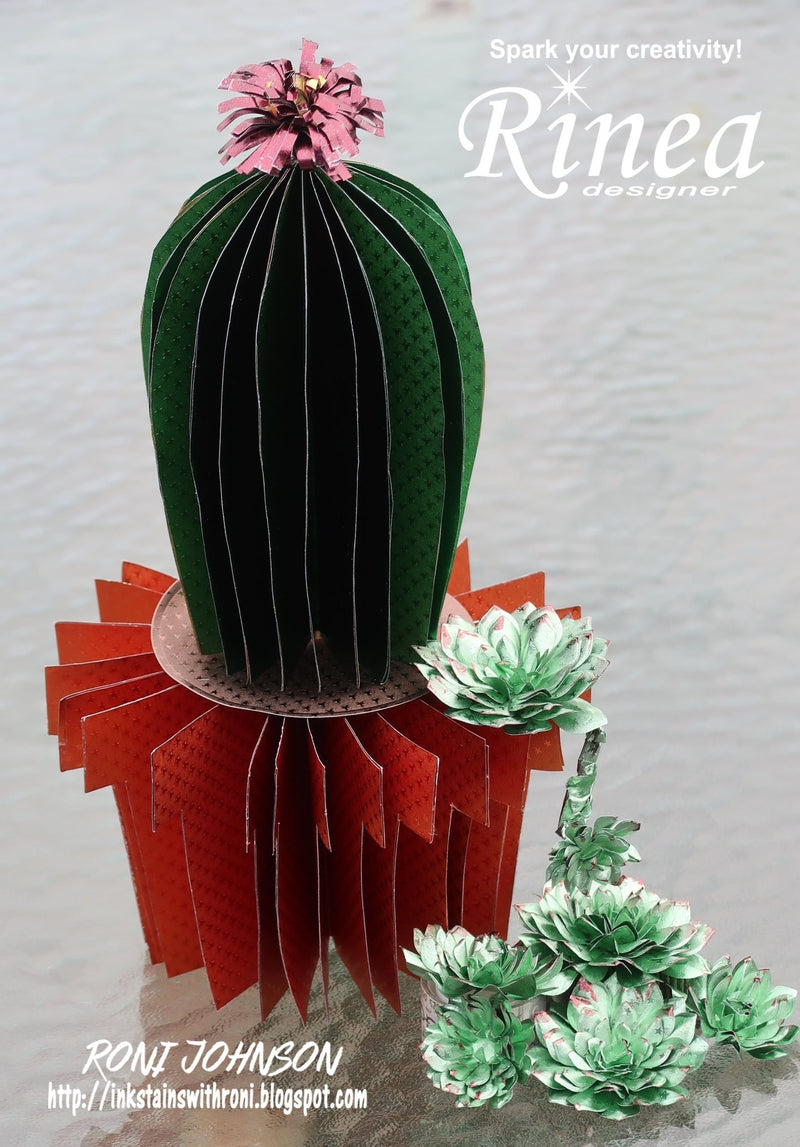
If you're like me and have a black thumb this project is for you! I have tried growing succulents and cactus for several years now without success. I have a tendency to over-water and they always die so I decided not to kill any more innocent succulents and make them from paper instead - LOL!!
This is a fun and easy project that can be completed in very little time. The best part is the cactus can be dismantled and stored or mailed flat if necessary!
Directions:
Part 1 - Create the Flower Pot.
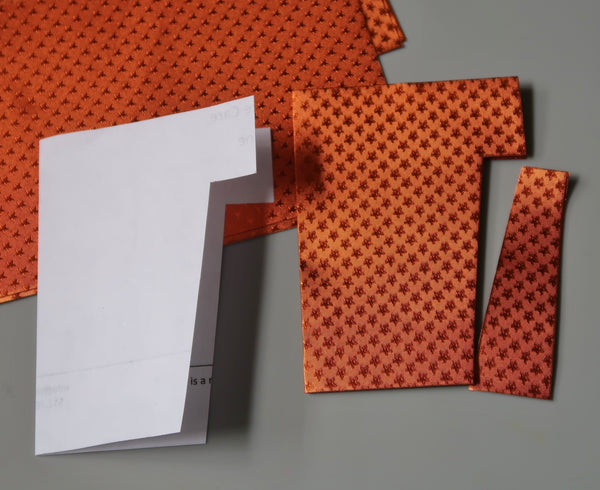
Step 1 - Fold 16-20 4"x6" pieces of Marigold/Marigold Starstruck foiled paper in half to create a 3" x 4" stack of folded pieces. Make a simple flower pot design and cut each piece using this template.
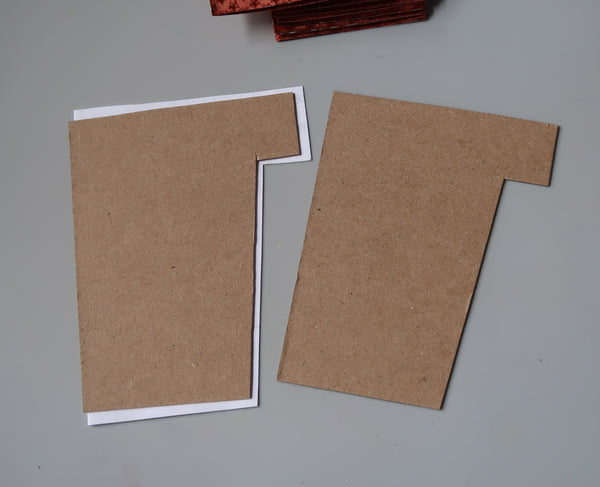
Step 2 - Cut two pieces of chipboard slightly smaller than the flower pot template.
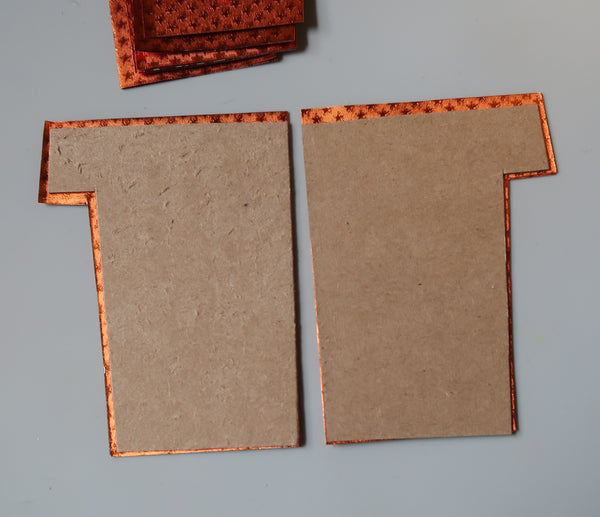
Step 3 - Glue the chipboard pieces to two of the foiled paper flower pot pieces as shown. These will be essential for the display of your finished project.
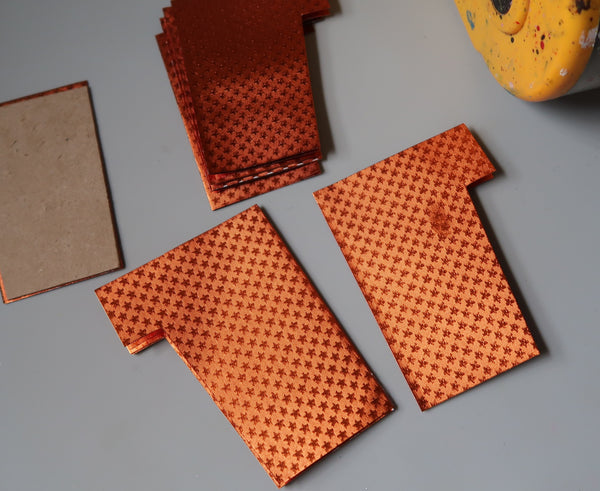
Step 4 - Glue all of the cut flower pot pieces back to back creating a large stack of foiled paper. Begin the stack with one of the chipboard pieces facing down. The last piece should be the second chipboard flower pot on top.

When the two chipboard pieces are joined you can hold them together with a paper clip. Spread out the layers to create a 3D flower pot!
Part 2 - Create the Cactus
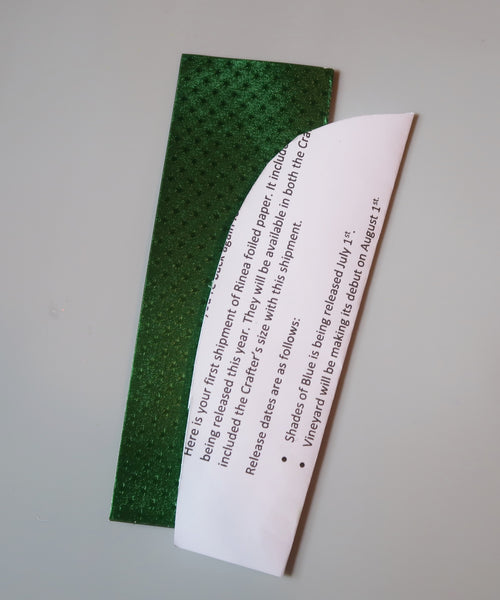
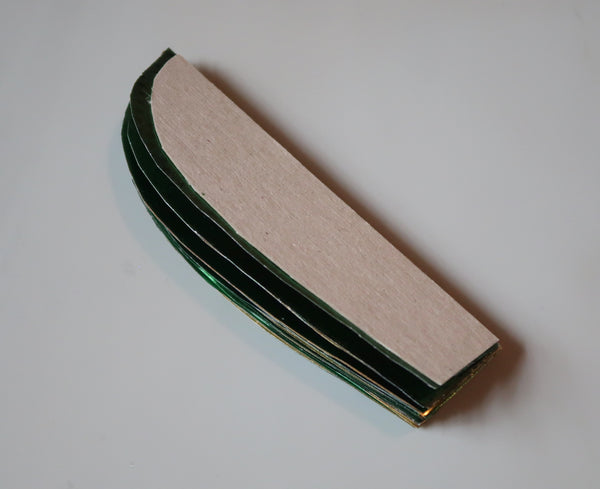
Step 1 - Fold 18-20 4" x 6" pieces of Emerald/Emerald Starstruck and/or Emerald/Gold Glossy foiled paper in half lengthways.
Step 2 - Cut out a cactus shape design as desire.
Step 3 - Cut the foiled paper using this design.
Step 4 Cut two pieces of chipboard slightly smaller than the template. These again will be used to hold the 3D cactus together.
Step 5. Glue all of the cactus pieces together layer after layer starting with one of the chipboard pieces just as you did with the flower pop. The final layer of the stack should be the second chipboard half.
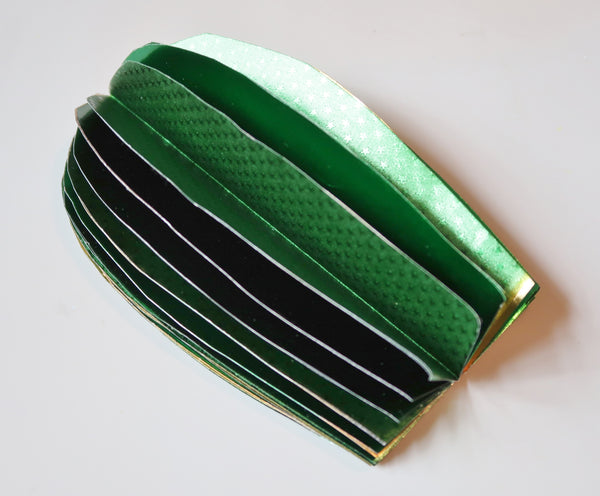
Note: I alternated the Emerald/Gold Glossy and the Emerald/Emerald Starstruck pieces randomly to give it a more organic feel. No matter what direction you look at it will always be different.
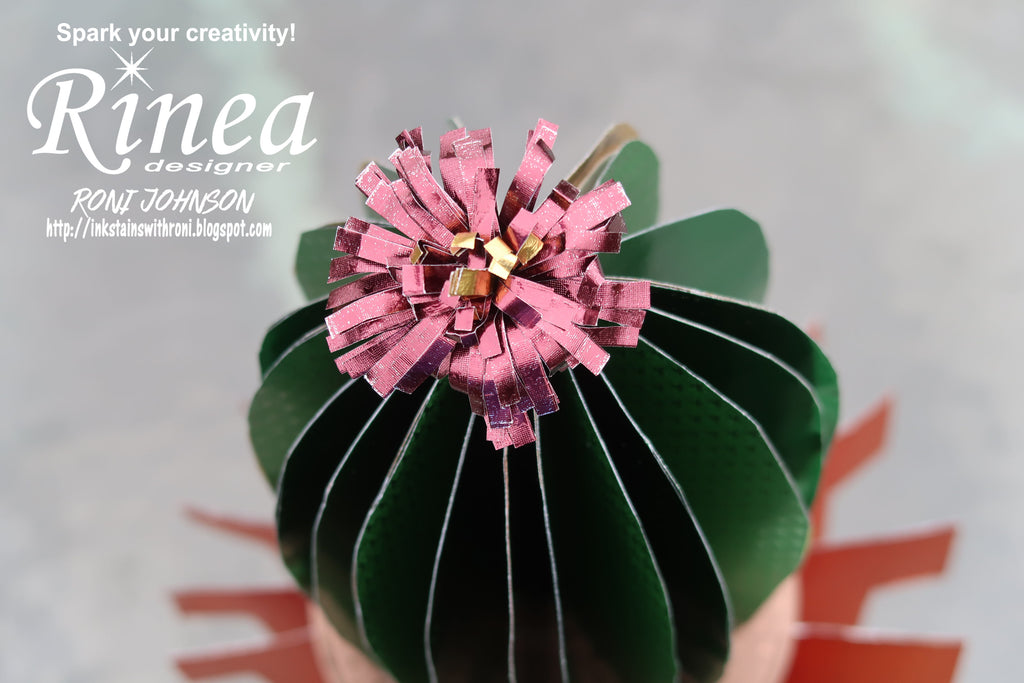
Step 3 - Make a Cactus Flower
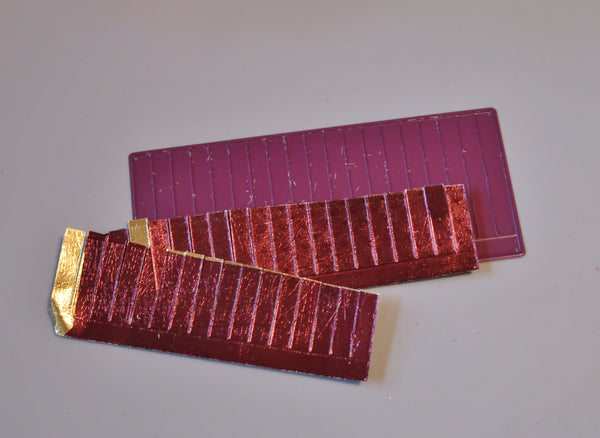
Step 1 - Use the flower die from the 3D Hyacinth Die set to cut a 1" strip of Merlot/Gold Glossy Foiled Paper and a 1" (x2) piece of Merlot/Merlot Starstruck Foiled Paper.
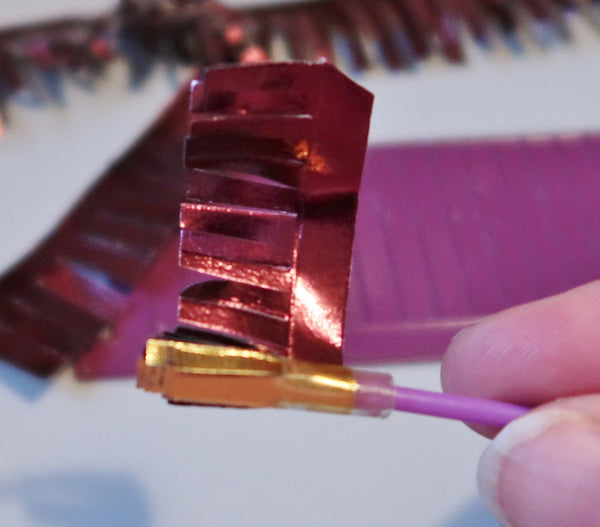
Step 2 - Wrap the Merlot/Gold Glossy die-cut strip around a cotton swab stick (or toothpick, skewer, etc) with the gold side out.
Step 3 - Wrap the Merlot/Merlot Starstruck die-cut pieces around the gold and secure.
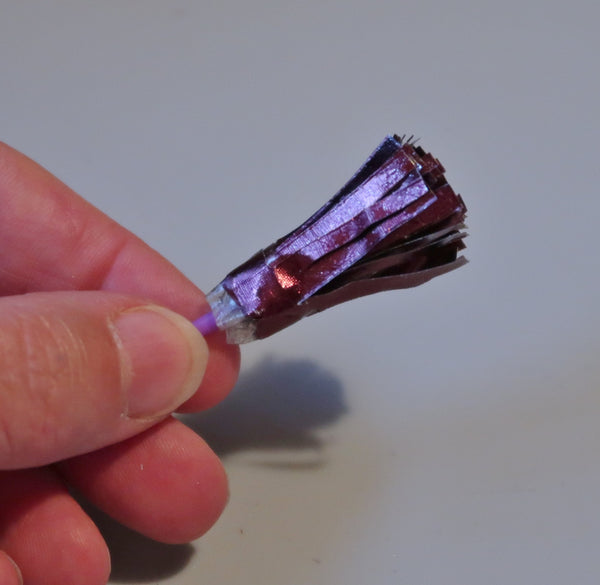
Step 4 - Fluff and shape the flower as desired.
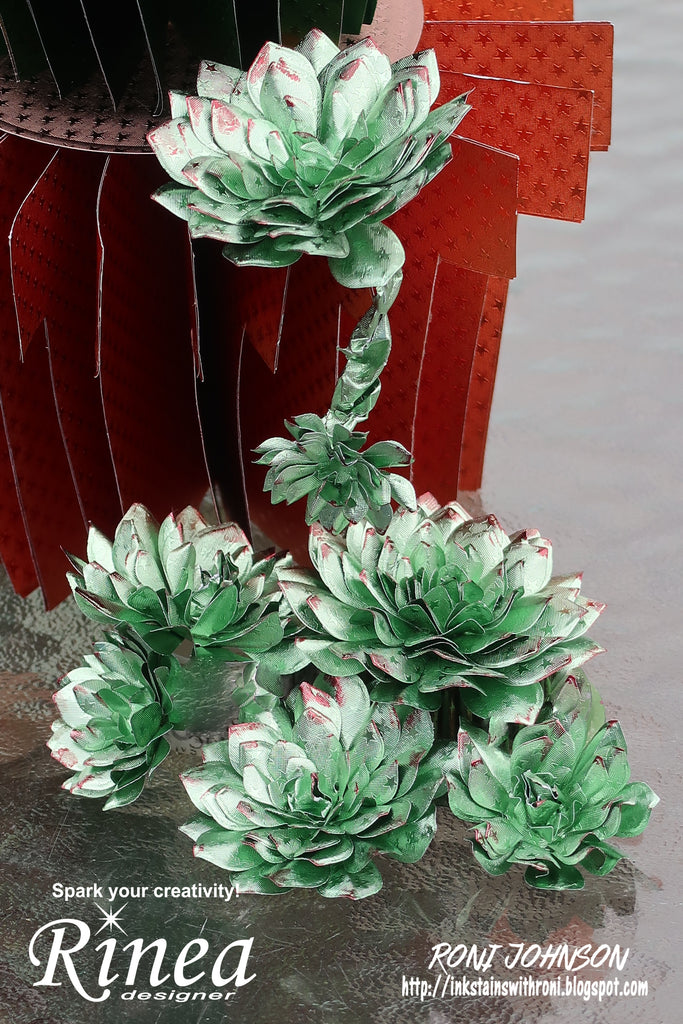
Step 4 - Assemble the Cactus
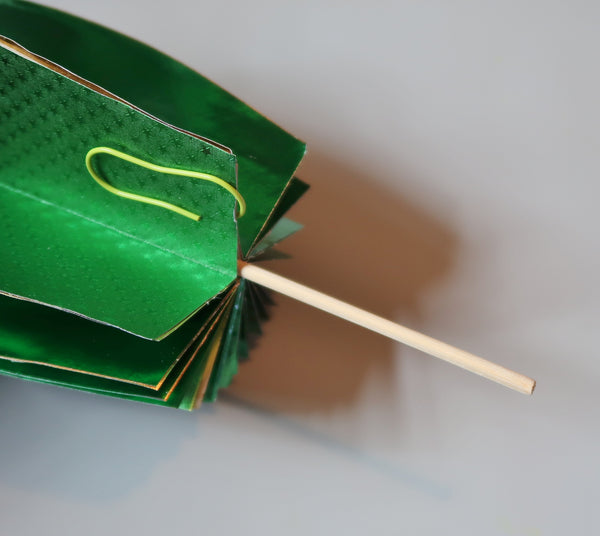
Step 1 - When you open the cactus up, slip a 9-10" long skewer into the center of the cactus with about 4" sticking out the bottom. Secure the two chipboard halves together with a paperclip to secure it.
Step 2 - Open the flower pot and secure the two pieces of chipboard together using a second paperclip.
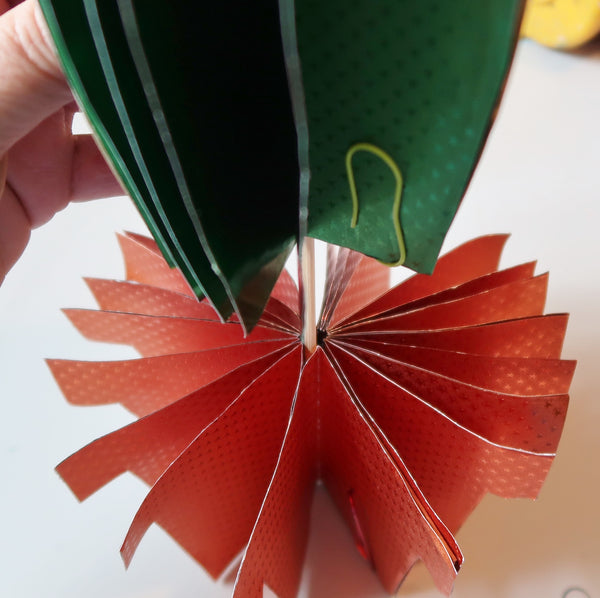
Step 3 - Slide the skewer in the cactus into the center of the flower pot as shown.
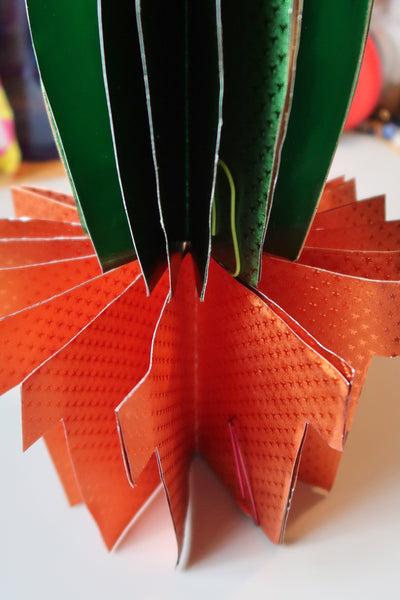
Step 4 - Alight the chipboard pieces of the cactus and flower pot together. This helps to make the structure a bit more stable.
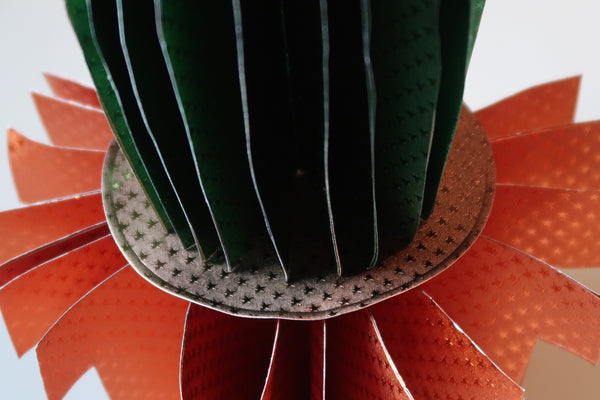
Step 5 - (Optional) If desired cut a 4" circle from Mocha/Mocha Starstruck foiled paper and insert it between the cactus and the flowerpot to create the illusion of soil in the flowerpot. This was an after-thought but it gave the finished design a tidy appearance.
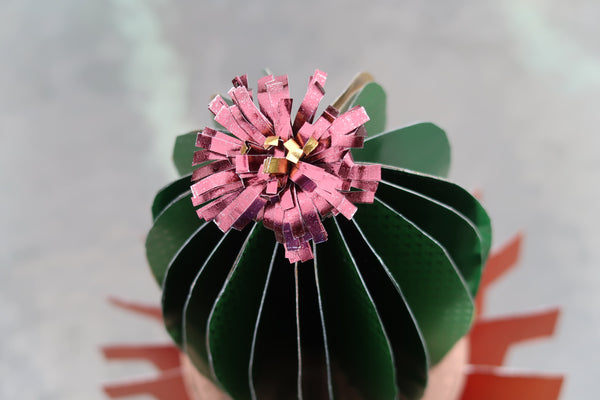
Step 6 - Insert the flower into the top of the cactus to finish off the look.
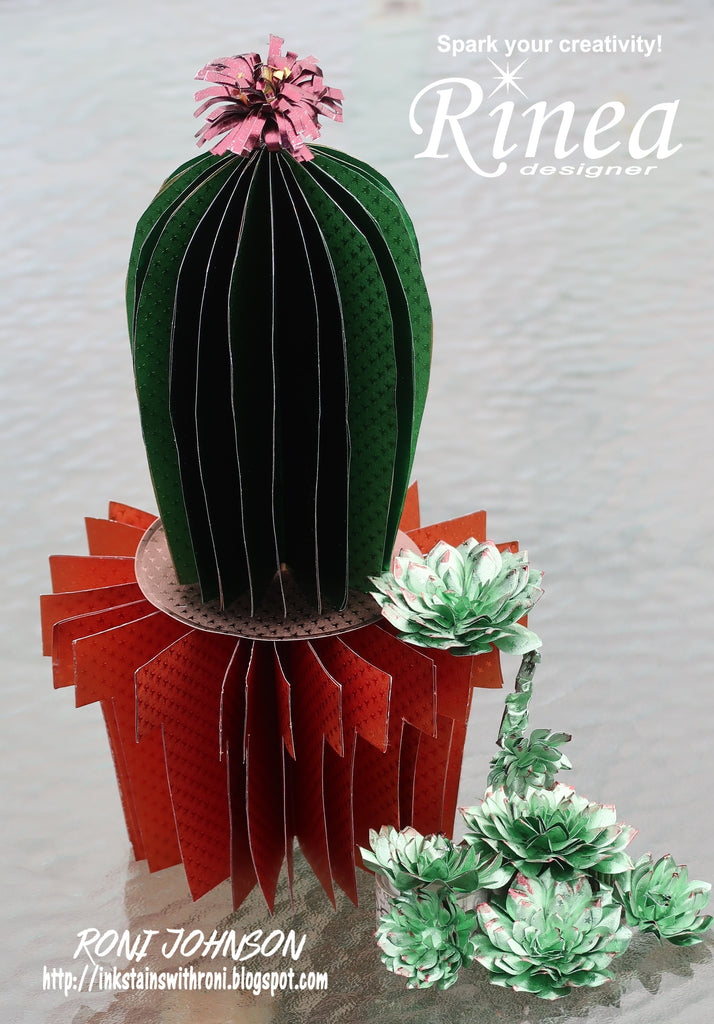
BONUS - Hens and Chicks
I thought the cactus looked a bit sad and lonely all by its self so I made some Hens and Chicks to accompany it. Here's a quick bonus tutorial on how to make them.
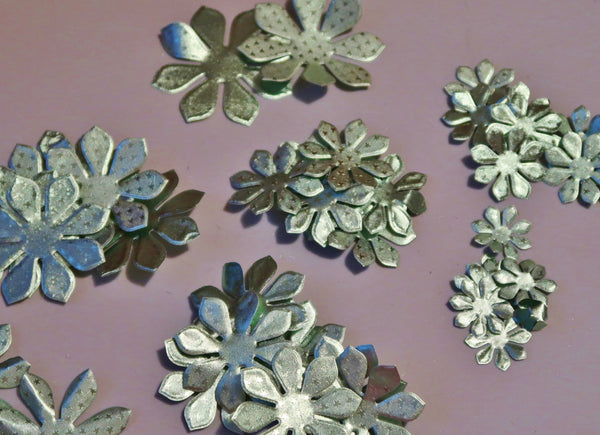
Step 1 - Cut several petals of each size from Jade/Jade Starstruck foiled paper using the Spellbinders Succulent and Mum Flower die cut set.
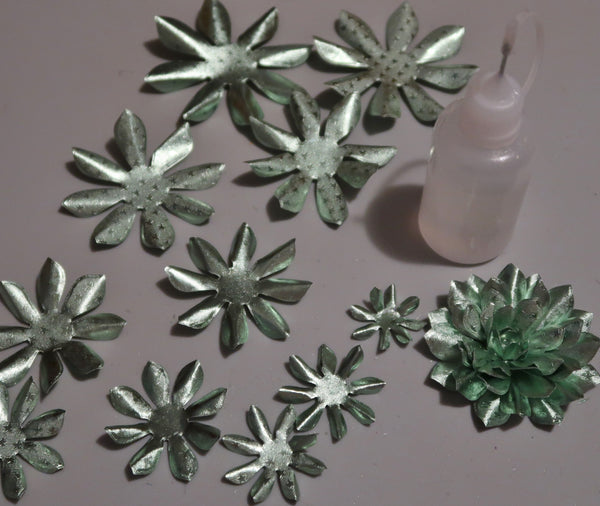
Step 2 - Form each layer by gently squeezing the leaf to give it a bit of texture.
Step 3 - Glue the layers down starting from the largest working to the smallest. You will notice the finished Hen off to the right. It was made using two of each of the 6 different sized petals.
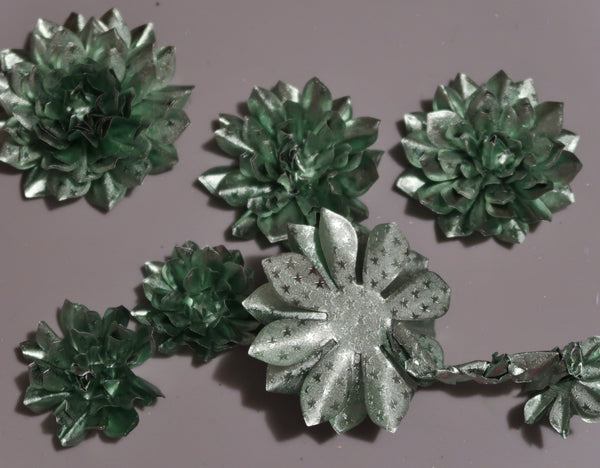
Step 4 - Repeat the shaping and gluing until you have as many Hens and Chicks as you need. Vary the petal sizes and numbers used to create several different sized pieces.
Note - I took a scrap of the foiled paper and twisted it to make the "vine" used to create the hanging chick.
Step 5 - (Optional) - I used my finger to dab a bit of Claret StazOn ink to the edges of the hens and chicks for a bit of color.
Supplies:
Rinea - Emerald/Gold Glossy, Emerald/Emerald Starstruck, Marigold/Marigold Starstruck, Mocha/Mocha Starstruck, Jade/Jade Starstruck, Merlot/Gold Glossy, Merlot/Merlot Starstruck
MFT - Stitched Circle
Spellbinders - Succulent & Mum Flower diecut set
Imagine - StazOn ink - Claret
Skewer, Glue