Learn How To Make a Pinata
By Roni Johnson


Cinco de Mayo is quickly approaching and today I have a fun little project that will get your party started. A fun little Donkey Pinata that measures 9" tall, 12" long and 2.5" wide. By following these simple instructions you can make your donkey pinata any size you need with a few minor adjustments.
Let's begin...
Directions:

Step 1 - Free hand draw or download a donkey pinata template on a piece of chipboard x 2. Mine is approximately 9" tall and 12" long from tip to tail.

Step 2 - Cut strips of chipboard to the desired width of your pinata. I went with 2.5" wide. Tape these strips of chipboard end to end with masking tape so you have one long continuous piece of chipboard. It's always better to have more but you can add to this strip later on if necessary.

Step 3 - Begin taping the chipboard strip to the two sides of your pinata. I like to start on the back of the donkey above the back legs. Use the masking tape to secure the strip to each chipboard donkey.

Continue taping the chipboard strip around the outline of the donkey.

It's o.k. if the chipboard strip doesn't line up perfectly with both sides of the pinata as they will be completely covered in the foiled paper.

Step 4 - (Optional) - If you'd like to fill the pinata with treats, when you get back to where you started taping the chipboard strip to the sides leave a 1 1/2 - 2 1/2" gap. This will allow you to add candy and small gifts to the pinata once it has been decorated.

Step 5 - Use the flower die from the 3D Hyacinth die set to cut desired colors of Rinea Foiled Paper. This will be the fringe used to cover the entire pinata.
NOTE - Don't throw away those scraps from cutting the fringe. They will be used later in the process.
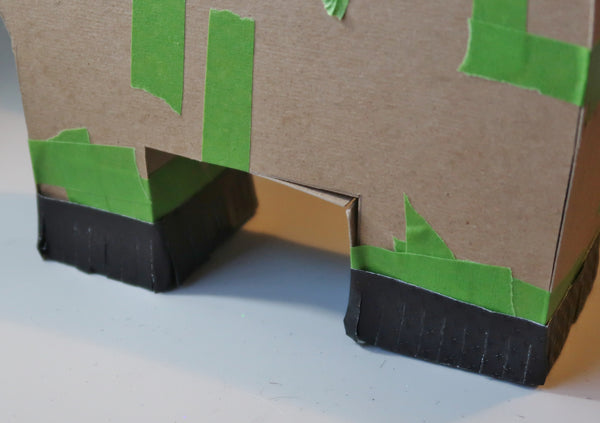
Step 6 - Cut a piece of Ebony/Ebony Starstruck foiled paper to cover the bottoms of the feet.
Step 7 - Wrap a piece of red line tape around the base of the feet, remove the liner and adhere an Ebony/Ebony Starstruck piece of fringe to create the donkey hooves. Repeat on the second set of legs.

Step 9 - Trim off the excess fringe from the feet.

Step 10 - You will need to cover the back and face first since this fringe needs to be wrapped over the back and around the face.
To cover the back I started by the tail section and wrapped the fringe approximately 1/2" - 1" over the sides and continued to layer in this manor until I reached the neck. You can cover cover the fill hole and simply lift the fringe up to fill when desired.
To cover the face, cover the nose with a piece of Gold/Gold Starstruck foiled paper in the same fashion as you did the bottom of the feet. The wrap the fringe around the muzzle until you reach the neck area.

Step 11 - Once the muzzle of the donkey has been covered in fringe, cover the rest of the face as you did the back wrapping a bit of extra fringe over the side until you reach the ears.
Step 12 - (Optional) - Ears - you can leave the ear area as one solid piece (like the legs) or you can do a bit of cutting to create two desperate ears. If you want to ears, cut down the center of the ear area until you reach the head. Make 1/4" cuts from the center towards the outside of the ear at the head, top two points of the ears and at the back of the head. These relief cuts will allow you to fold that 1/4" flap towards the center of each ear. Secure these folded pieces with tape.
Step 13 - Cover the top of the ear(s) with desired color of foiled paper.

Step 14 - Now it's time to start covering the body of the pinata with fringe. Work from the bottom of the feet up. Simply wrap a piece of red line tape around the area to be covered, remove the liner and cover with fringe.
This is where the magic happens. You can choose any color combination you like, have fun, mix it up a bit. I went with the Floral and Peacock variety pack colors.

After the legs are covered continue working your way up the pinata right up to the tips of the ears.

Step 15 - Remember all those scraps from cutting the fringe out? It's time to put them to use. Cut the short ends off and make a pile of the long scrap pieces. These will become the tail.

Step 16 - Gather all of the long scrap pieces together and secure them together with a twist tie. Make sure it is really bound tightly together. Apply your favorite glue to the end of the bundle to make sure all of the little pieces are secure and let dry.
Step 17 - Lift the fringe at the back of the donkey and poke a hole in the chipboard large enough to slip the tail in. Glue the tail in place and let dry. Once the glue has dried smooth the fringe back down around the tail.

Step 18 - To give your pinata a bit of personality, cut eyes and nose holes from Ebony/Ebony Starstruck and Arctic/Gold Glossy foiled paper and glue in place.
Step 19 - Fluff the fringe to give it a bit of depth and dimension.


Supplies:
Rinea: Ebony/Ebony Starstruck, Arctic/Gold Glossy, Gold/Gold Glossy, Peacock Variety Pack, Floral Variety Pack, 3D Hyacinth Die
Other Supplies:
Chipboard, Masking Tape, Red Line Tape, Twist Tie, Liquid Glue, Die Cutting Machine
