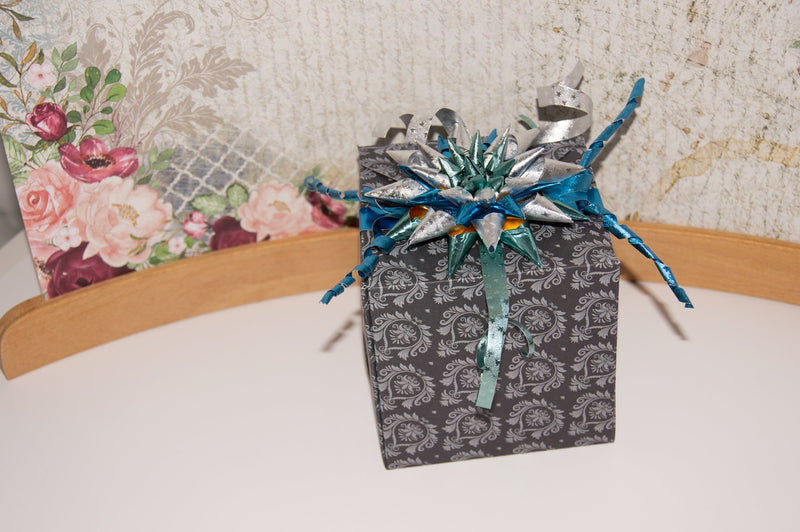
Luxury gift box with Rinea Flower by Natalie Ballard

I’m writing this in July, when our thoughts as crafters turn to Christmas. I wanted to share a luxury wrapping project with you for those extra special presents, but make it really easy.
For this project we are using:
6x12 Silver Star
6x12 Sapphire/gold glossy paper
6x12 Turquoise star paper
12x12 paper to create your box
Star die
Pencil & Gridded/Quilting Ruler
Embossing/scoring tool
Making the box
I used a 1-2-3 punch board to make my box really quickly. However, if you don’t have a box making board, here’s the method to make your own…
- With your 12x12” paper (must measure this exactly), draw a line connecting each point to the opposite point of the square so your get a x.
- Rotate your paper 45º so your x becomes a +.
- Working from the centre out, mark 2” and 6” along each line.
- Using your ruler draw a 4” square using the 2” marks. Use the grid on your ruler to help keep your lines square to the centre cross.
- To the 4 edges of your square you are going to add another 4” square using the 6” mark.
- Score all of these lines apart from the centre x.
- You now need to rotate the paper 45º so your squares form an x.
- Score vertically and horizontally at the centre of each side of your paper upto the x of squares.
- These last scores should be folded gently right sides together. All other scores should be folded inwards.
- This will then fold up into a box for your gift. Add the gift and seal the lid with velcro dots (reusable box) or tape (one use only).
Making the star
Step 1
Using the star die to make a half star
There are 3 sizes of die so you will need to cut one of each to be able to create the half star. When you are doing your die cutting be sure to cut your foiled paper glossy side down.

I cut the base star die (3) from the Silver Starstruck; two mid layers (2) from the Sapphire/Gold glossy; and one inner star (1) from the Turquoise Starstruck foiled paper sheet. If you want to go all out puffy cut an extra (3) in the Turquoise and an extra (2) in the Silver.

Shape and form the star petals following the included instructions with the die. I find I get a tighter curl working with round nose pliers than using a pencil; this is a good idea if your box is going to be used for a long time.
Adhere your formed stars together starting with alternating your base layers (if you are using more than one) and adhere them with red tape and hot glue. Next, add in your mid layer(s) allowing the petals to fall between the previous layers. Finally your inner layer, which should push right up in the middle of your star. With the centre layer be sure to push 1 petal to the centre.
If you want a more intricate look then mixing the finishes and colours helps to create this. You can also add colouring prior to forming once you become confident with the dies.
Step 2
Cut strips thinly from the silver star and wrap them around your finger to form a light curve.
Step 3
Cut wider strips from the Sapphire star and slit this towards middle as per the illustration below. Tightly twist each leg (by wrapping around a wire wrapping bar or this rod/knitting needle); move towards at 45 degree angles.
Step 4
Wrap the box with a piece of the blue gold glossy foiled paper. cut into a 1 ½ cm strip. You may need to join your strips together with some red liner tape. You could emboss this strip with an embossing folder or stamp with Ghost Ink if you have used a plainer card for your box.
Step 5
Adhere your elements to your band using red liner tape.
