Picnic Scene Card Tutorial by Nancy

Hi, everyone! It's Nancy here today!
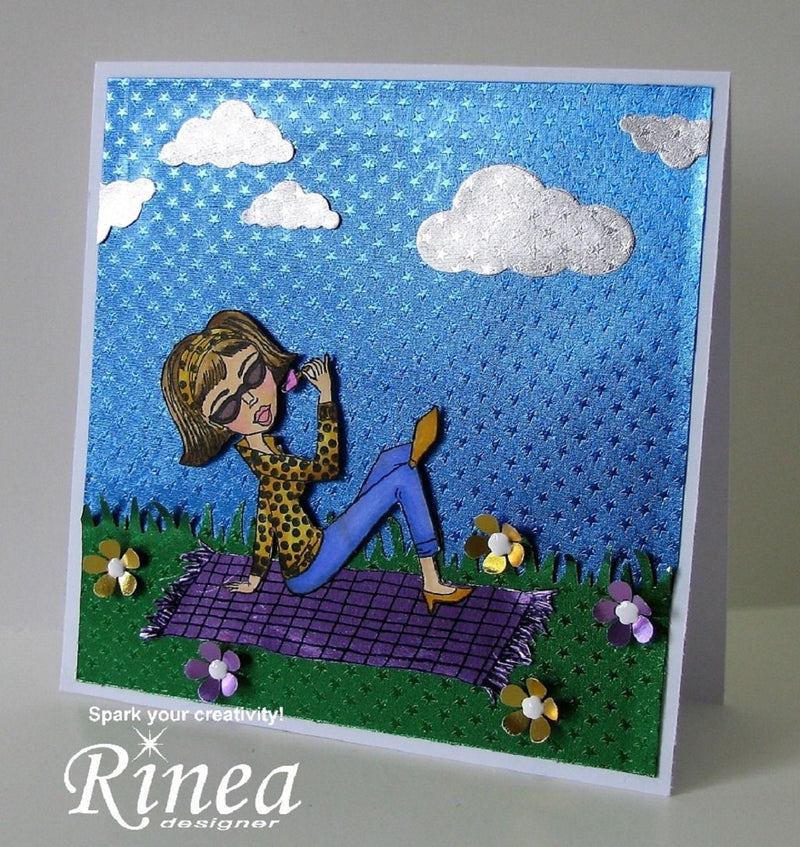
I'm going to show you how to create this fun picnic scene card:

I'm using the Princess Foiled Paper Variety Pack for this project,
along with a piece of Emerald/Emerald Starstruck Paper,
and a piece of Sapphire/Sapphire Starstruck Paper.
We're also partnering up all this month with Rita Barakat,
and I've used the lovely Picnic Princess Stamp Set.
Other materials used:

1. Using the Memento Ink, I stamped the image on white card.
2.Using the StazOn Ink, I stamped the picnic blanket part of the image on the Lavender/Gold Glossy Foiled Paper.

3. Create a 5 1/2" square card base from white cardstock.
4. From the Sapphire/Sapphire Starstruck Paper cut a piece that measures 5 1/2"x 4".
5. From the Emerald/Emerald Starstruck Paper, cut a piece that measures 5 1/2"x 2". Punch across the the top of this piece using the Grass border punch.
6. Die-cut some clouds out of the Silver/Silver Starstruck Foiled Paper.
7. Fussy cut the picnic blanket. Now adhere all these pieces in place on the card base. Refer to the finished card for placement.

8. Color the image, and then fussy cut it out, cutting off the picnic blanket.

9. Using a flower punch, punch several flowers out of the piece used for the picnic blanket. They are purple on one side, and gold on the other side.

10. I added the blue sky piece first. Next, I added the green grass piece, bending some of the grass forward to add dimension. I adhered the clouds in place, and then added the picnic blanket where I wanted it. I used a wet glue on the bottom of the image, where it adhered to the picnic blanket. I added foam tape to the rest of the image, to make it stand out from the background. Finally, I added the flowers randomly around the page.

Here's a close-up of the image:

Here's is one final look at the finished card: