How To Create A Pocket Card
by Steph Ackerman

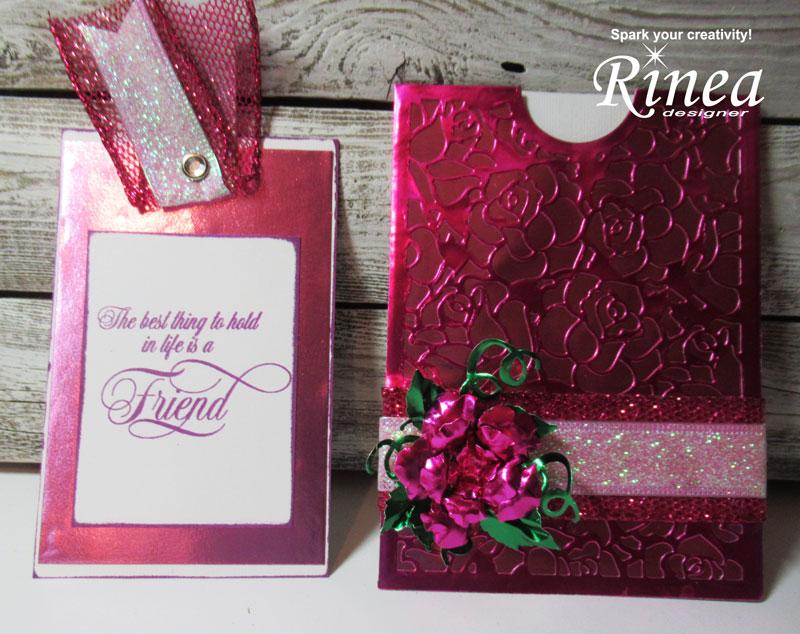
Hi everyone, Steph Ackerman here today using an assortment of foiled papers and die cut elements to create a pocket card. Pocket cards are really sweet to create and give to the special people in our lives with an encouraging tag and note slipped inside.
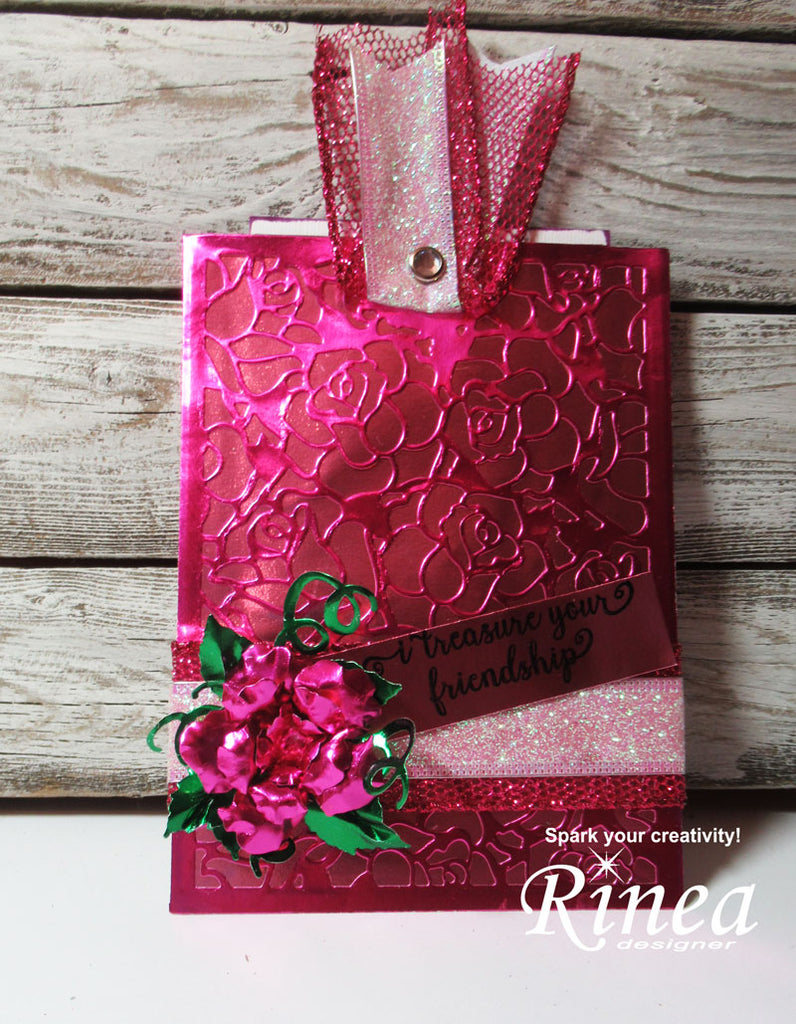

Using a large pocket die from Elizabeth Craft Designs, I die cut Fuchsia/Gold Glossy Foiled Paper. The foils cut beautifully and the design is stunning.

Folding on the scored lines, I created the pocket. Next, I cut Blush/Gold Glossy Foiled Paper to fit behind the die cut panel and adhered it in place for a tone on tone effect.

I wrapped 2 different sizes of ribbon around the panel. Then adhered the panel to white cardstock creating the pocket for the tag.

To decorate the pocket, I used Heartfelt Creations dies to die cut assorted sized roses from Fuschia/Gold Glossy Foiled Paper and leaves from Emerald/Gold Glossy Foiled Paper.

After forming and gluing the roses together, the roses and leaves were placed off to one side of the pocket atop the ribbon.

A tag was created from cardstock and Blush/Gold Foiled Paper was layered on top. A phrase was stamped on cardstock and then adhered to the tag. Using the same ribbons used to wrap the pocket, I added them to the top of the tag with a brad.

The tag slips inside the pocket and can be easily removed. Finally, a phrase was stamped on a scrap of Fuchsia and placed behind the rose.

Thanks for stopping by.
Steph