Rainbow Parade Card by Natalie Ballard

Using up your offcuts and being environmentally friendly
This project was created on Earth Day with a focus on using waste. It’s a great project for beginners and thrifty crafters and can be made using a strip die or trimmer.

You will need:
- Rinea Foiled Paper offcuts in a selection of colours suitable for a rainbow
- Black glitter card and A6 white card panels
- Pre-scored or adaptable card bases
- Strip die or trimmer (this one is by Tattered Lace and cuts 3mm strips)
- Sentiment stamp and black ink (I used a sentiment stamp from Chocolate Baroque)
- Start by cutting strips from each of your Rinea papers with either a strip die or your trimmer. These should be as regular as possible to get a great finish with these designs. My strips are 3mm each.


- Apply double-sided tape to your card panel. In keeping with the eco-focus, I used some card panels from an old swatch book. I applied the tape across the text using a T-square, this will help you when aligning your strips.

- Align your strips so you create two rainbows using your strips so your colours go 1-7-7-1 in one run.

- Trim between your two like colours and reorder so your rainbow borders the outside edges. Join at the back with some wide masking tape temporarily.

- Cut the strip die from a piece of black glitter card, or cut several strips using your trimmer.
- Adhere your panel to you card front and use the glitter card to edge the panel.


- Stamp your chosen sentiment using a stamp platform
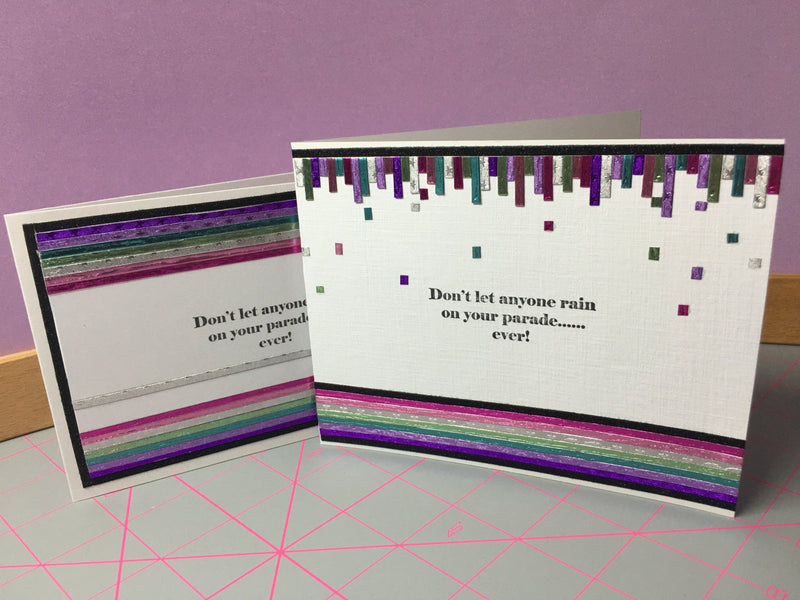
Version Two
Using the same materials, I took the design a step further.
- Create another panel using just one rainbow at the bottom. Line the top edge with another line of tape. Stamp your chosen sentiment at this stage.

- Using tail ends or the remaining strips, decorate the top edge with vertical pieces. Be sure to mix your colours randomly. Trim longer strips as you go so the piece remains easier to work with.

- With your trimmed pieces, chop them up to add “droplets”. Keep your colours aligned for a nice, neat finish.
